
Setting up your American Camper tent doesn’t have to be a chore! This guide breaks down the process into simple, manageable steps. You’ll learn how to prepare your site, assemble the poles, pitch the tent, and secure it for a comfortable camping experience. Follow along to ensure your adventures are off to a great start.
Welcome, campers! So, you’ve got a brand-new American Camper tent, and you’re ready to hit the great outdoors. That’s fantastic! But before you can relax under the stars or enjoy a cozy night’s sleep, you’ve got to get that tent set up. For some, this might seem like a daunting task, especially if you’re new to camping. But don’t worry! We’re here to guide you through the entire process.
This guide will walk you through setting up your American Camper tent, step-by-step. We’ll cover everything from choosing the perfect spot to making sure your tent is secure and ready for anything Mother Nature throws your way. By the end of this guide, you’ll be a tent-setup pro, ready to embrace your camping adventures with confidence.
Key Takeaways
- Clear Your Campsite First: Always select a flat, clear area free of rocks, roots, and debris to ensure a comfortable and safe tent setup.
- Identify and Organize Components: Before starting, lay out all tent parts – tent body, rainfly, poles, stakes, and guylines – to confirm you have everything and understand their purpose.
- Assemble Tent Poles Correctly: Connect the pole sections securely, ensuring they are fully inserted to prevent them from separating during setup.
- Pitch the Tent Body: Position the tent body in your chosen spot, usually with the door facing away from prevailing winds, and begin inserting poles into the grommets or sleeves.
- Attach the Rainfly: Drape the rainfly over the tent body, aligning it correctly, and secure it to the poles and tent corners.
- Stake Out and Secure: Use stakes to anchor the tent’s corners and guylines to provide stability against wind and weather.
- Ventilation is Key: Open tent vents or windows to promote airflow and reduce condensation inside, especially in humid conditions.
Before You Begin: Preparation is Key
A smooth tent setup starts long before you even touch the tent bag. Taking a few moments to prepare will save you a lot of hassle and ensure your tent stands strong throughout your trip.
1. Choose the Right Campsite
This is perhaps the most crucial first step. Look for a spot that is:
- Level: A sloped campsite can be uncomfortable to sleep on and can even cause water to pool around your tent.
- Clear: Remove any sharp rocks, sticks, pinecones, or roots that could puncture your tent floor or make your sleeping area lumpy. A clear area also makes for a safer environment.
- Sheltered: If possible, choose a spot that offers some natural protection from wind, like behind a cluster of trees. However, avoid camping directly under large or dead trees, as falling branches can be dangerous.
- Well-Drained: Avoid low-lying areas where water might collect if it rains.
2. Unpack and Inspect Your Tent
Once you’ve chosen your spot, it’s time to get your tent out of its bag. Lay out all the components and give them a quick once-over:
- Tent Body: The main part of your tent.
- Rainfly: The waterproof outer layer.
- Tent Poles: Usually made of fiberglass or aluminum, these give your tent its structure.
- Stakes: Used to secure the tent to the ground.
- Guylines: Ropes used to add extra stability.
Check for any tears, missing parts, or damage. It’s better to discover a problem now than when you’re miles from civilization.
3. Familiarize Yourself with Your Tent’s Design
American Camper tents, like most, have a general setup pattern, but specific models can vary. Look at the instructions that came with your tent, if you have them. Often, the poles will have colored tips or ends that correspond to colored grommets or sleeves on the tent body. This color-coding is a lifesaver during setup!
Step-by-Step Tent Setup
Now that you’re prepared, let’s get down to the actual tent setup. We’ll break this down into manageable steps.
Step 1: Lay Out the Tent Body
Spread the tent body out flat on your prepared campsite. Make sure the floor is facing down. Orient the tent so that the main door is facing the direction you prefer, perhaps away from the prevailing wind for better protection.
Visual guide about How to Set Up American Camper Tent
Image source: i.ebayimg.com
Visual guide about How to Set Up American Camper Tent
Image source: d3j17a2r8lnfte.cloudfront.net
Step 2: Assemble the Tent Poles
Tent poles typically come in sections that are connected by elastic cords. Take each pole section and connect them firmly. You should hear or feel a “snap” as the sections join together. Make sure each section is fully inserted into the next. A loose pole can be frustrating and compromise the tent’s structure.
Visual guide about How to Set Up American Camper Tent
Image source: i.ytimg.com
Tip: Some poles have a specific end that goes into a grommet (a reinforced hole) and another end that might fit into a pocket or clip. Pay attention to these details.
Step 3: Insert Poles into the Tent Sleeves or Clips
This is where the color-coding (if present) really comes in handy. Most tents have either pole sleeves (fabric tunnels sewn onto the tent) or clips (plastic attachments that fasten onto the poles). American Camper tents often utilize a combination or primarily clips for easier setup.
Using Sleeves:
Carefully feed the assembled poles through the designated sleeves on the tent body. Be gentle to avoid snagging the fabric. You might need to bend the pole slightly as you feed it through. Work the pole all the way through until it exits the sleeve on the other side.
Using Clips:
If your tent uses clips, lay the poles across the tent body in their intended positions. Then, one by one, attach the clips to the poles. Start from one end and work your way across, ensuring the poles are distributed evenly.
Step 4: Secure Pole Ends to the Tent
Once the poles are in place (either threaded through sleeves or laid across with clips attached), you’ll need to secure their ends. Most tents have grommets (metal rings) or pockets at the corners of the tent body. Insert the ends of the poles into these grommets or pockets. You might need to bend the pole significantly to get it into place. This is what creates the dome or tunnel shape of your tent.
As you insert the pole ends, the tent will start to take shape. You might need a second person to help hold the tent taut while you secure the poles.
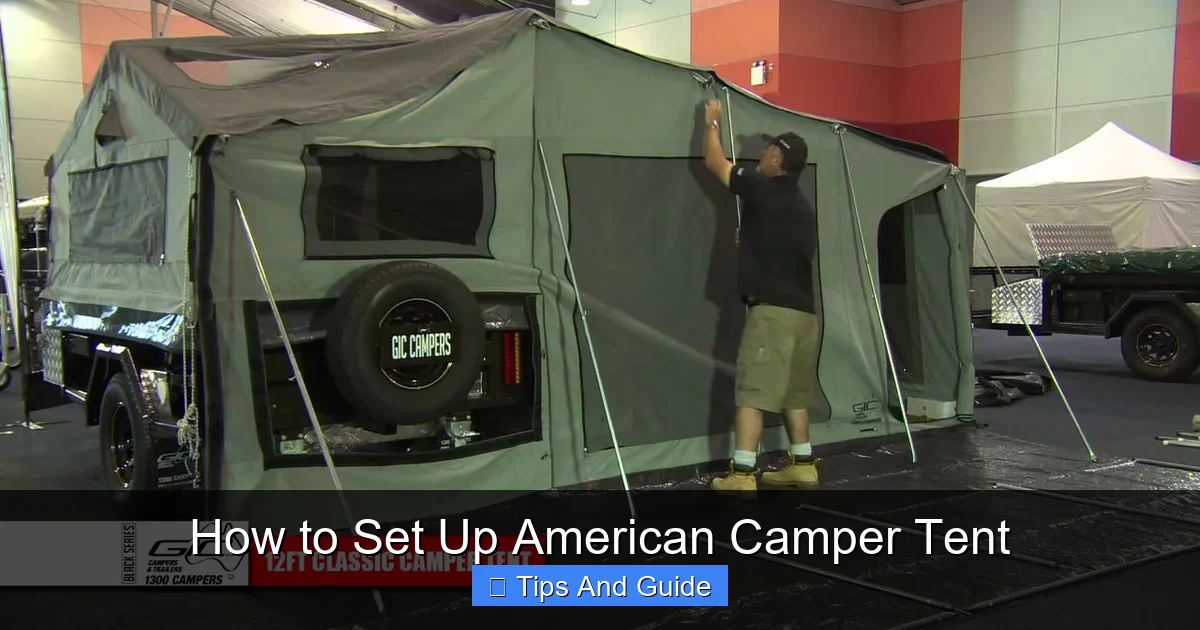
Step 5: Attach the Rainfly
This step is crucial for weather protection. Take your rainfly and drape it over the tent body. Make sure it’s oriented correctly. There’s usually a specific front and back to the rainfly, often indicated by the door flap.
Align the rainfly so that its attachment points (buckles, velcro straps, or grommets) line up with the corresponding points on the tent poles or the tent body itself. Secure the rainfly.
Tip: Many rainflies attach to the tent poles with velcro straps. Wrap these straps around the poles and fasten them securely.
Step 6: Stake Out the Tent
Now it’s time to anchor your tent firmly to the ground. Use the stakes provided.
Stake the Corners:
Start by staking out the corners of the tent floor. Insert a stake through each stake loop at the corners and drive it into the ground at an angle, pointing away from the tent. This angle provides the best holding power.
Stake the Rainfly (if applicable):
If your rainfly has additional stake loops around its base, stake these out as well. This pulls the rainfly taut, creating a better seal and improving ventilation by keeping the rainfly away from the inner tent body.
Step 7: Set Up and Tension the Guylines
Guylines are your tent’s best friends in windy conditions. They provide crucial extra support and stability.
Locate the guyline loops on your rainfly. Attach a guyline to each loop. Extend the guyline away from the tent and use a stake to secure it. Angle the stake into the ground, similar to how you staked the tent corners.
Tension the guylines by adjusting the small sliders or knots on the lines. The goal is to make the rainfly taut, but not so tight that it distorts the tent shape. You want enough tension to resist wind without stressing the fabric.
Important: Ensure your guylines are not tripping hazards for yourself or others around the campsite.
Step 8: Final Checks and Adjustments
Walk around your tent and do a final inspection. Ensure all poles are securely in place, all clips are fastened, the rainfly is taut, and all stakes are driven in firmly.
Open the tent doors and windows to allow for ventilation. This helps prevent condensation buildup, especially on cooler or humid nights. If your tent has a footprint or ground tarp, ensure it’s placed correctly underneath the tent to protect the floor.
Troubleshooting Common Setup Issues
Even with the best intentions, sometimes things don’t go perfectly. Here are a few common issues and how to fix them:
My tent poles won’t go into the grommets easily.
Solution: Make sure you have the correct pole inserted. Sometimes poles are of slightly different lengths or thicknesses. Also, ensure the grommet isn’t obstructed. If it’s still difficult, try applying gentle, steady pressure. Forcing it can damage the pole or the tent.
The rainfly seems to be inside-out or not fitting correctly.
Solution: This usually means the rainfly is on backward or upside down. Take it off and re-orient it. Look for labels or specific features like the zipper placement of the main door to ensure you have it right.
My tent feels saggy or unstable.
Solution: This is often a guyline or staking issue. Re-tension your guylines. Make sure all stakes are driven deeply into the ground at a good angle. If it’s very windy, you might need to add more stakes to the base of the tent or use larger, more robust stakes.
Condensation is forming inside the tent.
Solution: Condensation is caused by moisture from your breath and body escaping the tent and condensing on the cooler inner surfaces. To combat this, ensure good ventilation. Open vents and windows as much as weather permits. Avoid touching the tent walls, as this can encourage condensation.
Tips for Easier Tent Setup
* Practice at Home: Before your first trip, set up your American Camper tent in your backyard. This allows you to get familiar with the process without the pressure of arriving at a campsite in the dark or bad weather.
* Bring a Friend: Setting up a tent is always easier with two people. One person can hold poles or tent sections while the other secures them.
* Lay Everything Out: Don’t just pull things out of the bag. Lay out all the components clearly so you can see what you have and where it goes.
* Watch the Weather: If possible, set up your tent when the weather is fair. Avoid doing it in heavy rain or strong winds for your first attempt.
* Keep it Clean: When packing up, try to pack a dry tent. If it’s wet, try to dry it out as soon as you get home to prevent mildew.
Conclusion
Setting up an American Camper tent is a straightforward process when you break it down into steps and prepare properly. By choosing a good location, organizing your gear, and following these instructions, you’ll have your shelter ready in no time. Remember, practice makes perfect! The more you set up your tent, the quicker and more efficient you’ll become. Now go forth and enjoy your camping adventures, knowing you’ve got a comfortable and secure home base. Happy camping!