
Setting up a party tent can seem daunting, but with the right steps, it’s a breeze! This guide will walk you through everything from preparation to securing your tent. You’ll learn how to choose the right spot, assemble the frame, attach the canopy, and make sure it’s stable and safe for your event. Follow these steps for a stress-free setup and enjoy your perfectly pitched party tent.
Planning an outdoor event or party? A party tent can be a fantastic addition, providing shade, shelter, and a designated space for your guests. But the thought of setting one up might seem a little overwhelming. Don’t worry! This comprehensive guide will break down the process into simple, manageable steps. By the end of this guide, you’ll feel confident in your ability to set up any party tent, ensuring your event goes off without a hitch.
We’ll cover everything from choosing the best spot to the final securing of your tent. Whether you have a simple pop-up canopy or a more elaborate frame tent, the core principles of setup remain the same. Let’s get started!
Key Takeaways
- Plan Ahead: Choose your tent and gather all necessary tools and parts before you begin.
- Select the Right Location: Opt for a level, clear area free from overhead obstructions and hazards.
- Assemble the Frame First: Follow the manufacturer’s instructions carefully to build the tent’s structural frame.
- Attach the Canopy Securely: Ensure the canopy is properly aligned and fastened to the frame for optimal coverage and stability.
- Stake and Secure Everything: Use all provided stakes, guy ropes, and weights to anchor the tent firmly against wind.
- Final Inspection: Double-check all connections, tension points, and the overall stability before allowing guests inside.
Step 1: Preparation is Key
Before you even think about unfolding your tent, take some time to prepare. This initial stage is crucial for a smooth and efficient setup.
Unpack and Inspect
Carefully unpack all components of your party tent. Lay everything out in a clear, open space. This is your chance to check that you have all the parts listed in the manufacturer’s instructions. Look for any damage that might have occurred during shipping. If anything is missing or damaged, contact the manufacturer immediately. It’s much easier to resolve these issues before you’re on a tight schedule.
Gather Your Tools
Most party tents come with basic tools, but you might need a few extra items:
- Mallet or Hammer: For driving stakes into the ground.
- Rubber Mallet: Useful for gently tapping frame pieces together without causing damage.
- Ladder or Step Stool: Especially helpful for taller tents to reach higher frame connections.
- Gloves: To protect your hands, as some frame pieces can be sharp or greasy.
- Measuring Tape: To ensure you’ve chosen an appropriately sized space.
- Scissors or Knife: For opening boxes and cutting any packaging ties.
- Friend(s): Many tents are much easier, and safer, to set up with an extra pair of hands.
Read the Instructions
This might sound obvious, but it’s vital. Every tent is slightly different. Take a few minutes to read through the manufacturer’s assembly instructions. Familiarize yourself with the diagrams and the order of operations. This will save you time and frustration later on.
Step 2: Choose the Perfect Location
The spot where you set up your party tent can significantly impact its stability, usability, and the overall success of your event.
Consider the Ground
Look for a level surface. A sloped area can cause the tent to lean, leading to uneven tension on the fabric and potential structural weakness. It can also be a tripping hazard. Avoid areas with soft, boggy ground that won’t adequately hold stakes. If you’re on pavement or a hard surface, you’ll need to use weights instead of stakes.
Visual guide about How to Set Up a Party Tent
Image source: i.pinimg.com
Clear the Area
Ensure the chosen spot is free from any obstructions. This includes:
- Overhanging Branches: These can damage the tent fabric or pose a safety risk if they fall.
- Rocks and Debris: These can puncture the tent floor (if it has one) or make it difficult to drive stakes.
- Underground Utilities: Be aware of sprinkler lines, irrigation systems, or electrical conduits if you plan to stake deeply. Check local regulations or call utility locating services if unsure.
Think About Accessibility and Flow
Consider how guests will enter and exit the tent. Is there enough space around it for comfortable movement? Think about the placement relative to your house, other party areas, or restrooms. You want easy access for setup, but also for your guests during the event.
Wind and Sun Exposure
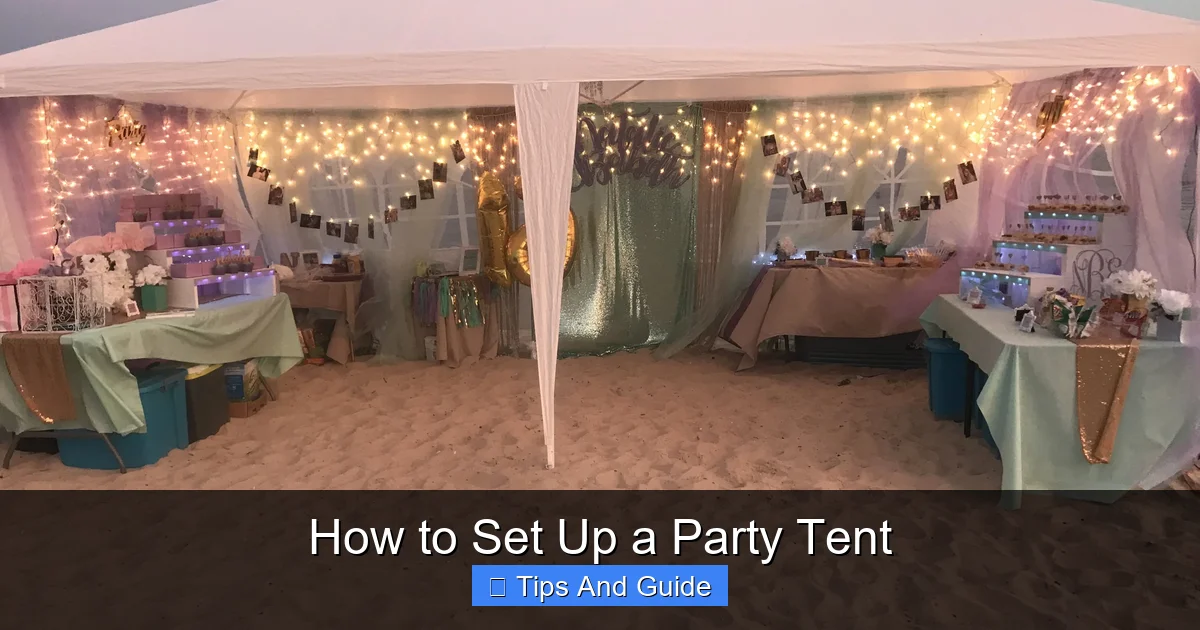
If possible, orient the tent to take advantage of natural shade. On hot days, positioning it to minimize direct sun exposure can make a big difference. Also, consider the prevailing wind direction. While you’ll be securing the tent, setting it up so the main entrance isn’t directly facing strong winds can be beneficial. For parties on the beach, ensure you have a tent designed for sandy conditions and strong breezes, as these can be particularly challenging.
Step 3: Assemble the Frame
This is where your tent starts to take shape. The process varies depending on the type of tent, but pop-up and frame tents have distinct assembly methods.
For Pop-Up Tents
Pop-up tents are designed for quick assembly. They often have a scissor-action frame that folds out.
Visual guide about How to Set Up a Party Tent
Image source: 306partyrentals.com
H3: Unfolding the Frame
Start by placing the folded frame in the center of your chosen area. Locate the push-button mechanisms on the legs or central hubs. Often, you’ll need to extend the legs slightly before the canopy can be fully opened. Gently pull the legs apart or push the center hub upwards (depending on the design) until the frame begins to open. It might make a clicking sound as it expands.
H3: Extending the Legs
Once the frame is partially open, you’ll typically need to extend the legs to their full height. Most pop-up tents have push-buttons or telescoping legs. Extend each leg until it locks into place. Ensure all legs are extended to the same height to keep the tent level.
H3: Attaching the Canopy
If the canopy isn’t already attached to the frame, now is the time to put it on. Drape the canopy over the open frame, ensuring it’s centered. Look for Velcro straps, ties, or grommets on the canopy that attach to corresponding points on the frame. Secure the canopy as tightly as possible to prevent flapping.
For Frame Tents
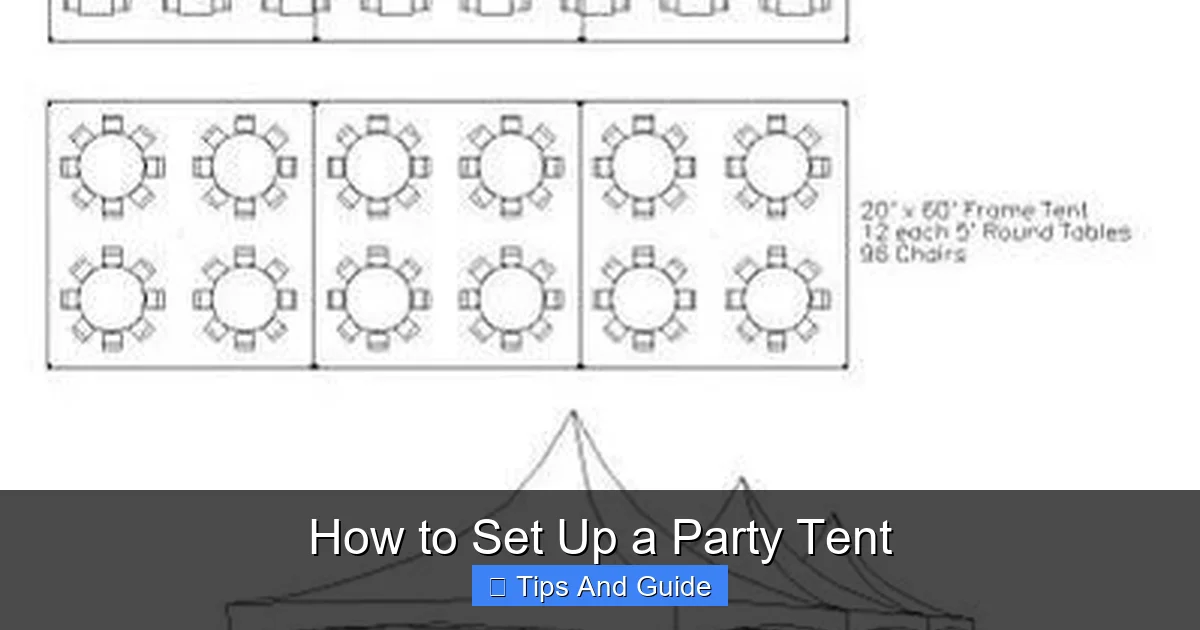
Frame tents, often found in larger sizes for weddings and events, have a more involved assembly process with poles and connectors.
H3: Laying Out the Frame Pieces
Identify the different frame pieces: long poles (rafters, legs) and shorter poles (purlins, braces). Refer to your instructions to understand how they connect. Lay them out in an organized manner near the assembly area.
H3: Connecting the Center Poles (if applicable)
Larger frame tents often have a central ridge pole that needs to be assembled first. This might require lifting it to a certain height, often using a ladder or by building sections of the frame first.
H3: Assembling the Base Frame
Start by connecting the leg poles to the corner connectors. Then, connect the purlins or side poles between the legs. Work your way around the perimeter of the tent, following the pattern in your instructions. For many tents, you’ll connect leg poles and then side poles, creating a series of connected rectangles or squares. Use a rubber mallet to gently tap pieces into place if they are a tight fit.
H3: Installing Rafters and Purlins
Rafters are the angled poles that form the roof structure. These typically connect to the tops of the leg poles and meet at the center ridge. Purlins run horizontally along the sides and roof to add rigidity. Ensure all connectors are secure and that the frame is starting to look square and stable.
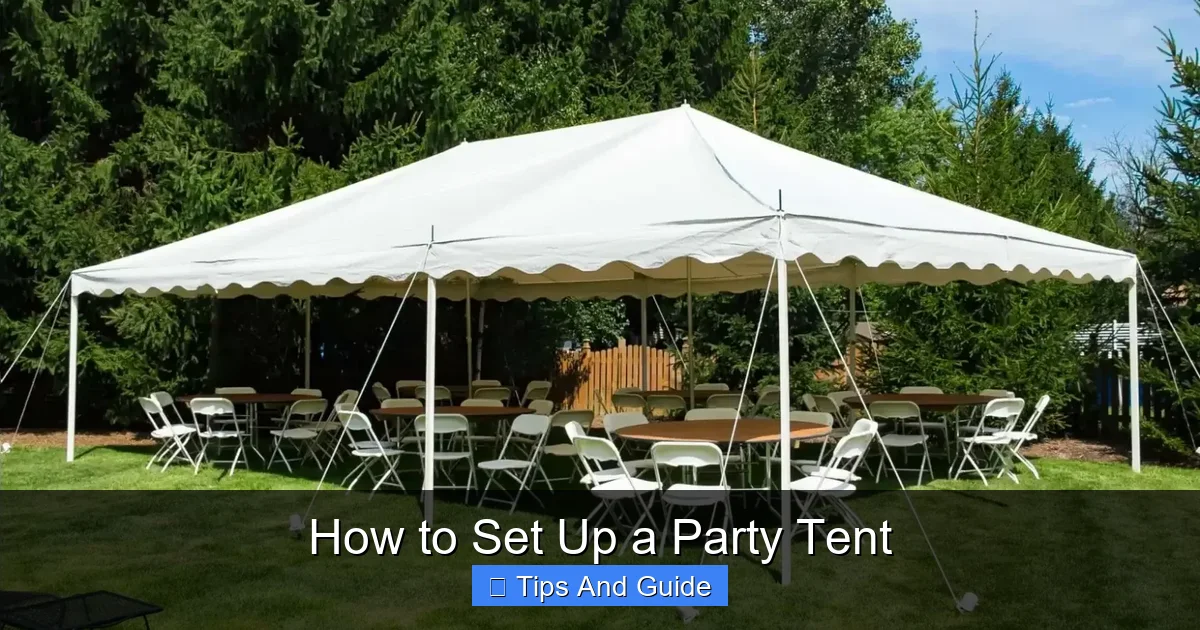
Step 4: Attach and Secure the Canopy
Once the frame is assembled, it’s time to put on the main tent fabric (the canopy). This is a critical step for both aesthetics and functionality.
Drape the Canopy
Carefully lift and drape the canopy over the assembled frame. Make sure it’s centered. If you have a pop-up tent, you might have already done this. For frame tents, this often involves pulling the fabric over the entire structure. If the canopy is heavy, enlist help to avoid straining yourself or damaging the fabric.
Visual guide about How to Set Up a Party Tent
Image source: shelter-structures.com
Secure the Canopy to the Frame
Look for attachment points. These can include:
- Velcro Straps: These are very common and wrap around frame poles. Fasten them tightly.
- Rope Loops or Grommets: These often run along the edges of the canopy and tie or hook onto frame pieces.
- Snap Buttons or Clips: Some tents use these for a more secure connection.
Work your way around the tent, ensuring the canopy is taut and wrinkle-free. A tight canopy will look better and perform better in wind and rain.
Attach Sidewalls (if applicable)
If your tent comes with sidewalls, now is the time to attach them. They usually connect to the frame and to the main canopy using zippers, Velcro, or clips. Ensure they are securely fastened to provide full enclosure and protection.
Step 5: Anchor the Tent Firmly
This is arguably the most important step for safety. A tent that isn’t properly anchored can be a hazard in even moderate wind.
Using Stakes
If you are on grass or soil, use the provided stakes. Drive them into the ground at an angle, leaning away from the tent, for maximum holding power. Ensure each stake goes as deep as possible. For larger tents, you might have multiple stake points on each leg or at the base of the fabric.
H3: Guy Ropes
Many tents come with guy ropes. These are essential for stability, especially in windy conditions. Attach the ropes to the designated loops on the tent fabric or frame. Extend the ropes outwards from the tent at about a 45-degree angle and secure them to the ground with additional stakes. Adjust the tension so the ropes are taut but not pulling the tent out of shape.
Using Weights (for hard surfaces)
If you’re setting up on concrete, asphalt, or decking, you cannot use stakes. In these cases, you’ll need to use weights. These can be:
- Water Barrels: Large plastic barrels filled with water provide significant weight.
- Sandbags: Heavy-duty sandbags are excellent for anchoring.
- Dedicated Tent Weights: Many suppliers offer specialized metal or concrete weights designed for tents.
Place weights on the base plates of the tent legs, or attach them securely to the frame. For larger tents, you may need a substantial amount of weight on each leg. Always ensure the weights are securely attached and won’t tip over.
Check for Stability
Once everything is staked or weighted, give the tent a gentle push. It should feel solid and secure. If there’s any wobble, reinforce your anchoring points. Check that all tensioners and straps are tight.
Step 6: Final Inspection and Touches
You’re almost there! A final check ensures everything is perfect for your guests.
Inspect All Connections
Walk around the entire tent. Double-check that all frame poles are securely locked together, all Velcro straps are fastened, and all stakes or weights are firmly in place. Ensure there are no loose or flapping pieces of fabric.
Clear Internal Obstructions
Make sure the interior of the tent is clear. Remove any tools, packaging, or debris left from the setup process.
Consider Lighting and Decor
If your event will extend into the evening, think about lighting. Battery-operated fairy lights or temporary string lights can add ambiance. You might also want to add decorations to personalize the space.
Troubleshooting Common Issues
Even with the best preparation, you might encounter a few snags.
Tent Won’t Expand Fully (Pop-Up)
Problem: The frame seems stuck and won’t open to its full height.
Solution: Ensure that all push-button locks are fully engaged. Sometimes a leg can get slightly out of alignment. Gently wiggle the frame or legs while pressing the buttons to help them slide into place. Check for any debris caught in the telescoping sections.
Fabric is Too Loose
Problem: The canopy is sagging or has large wrinkles.
Solution: Re-tension the fabric. Check all Velcro straps, ropes, and tie-downs. For frame tents, ensure the frame itself is square and not twisted. You might need to adjust the angle of the guy ropes or the position of the stakes.
Stakes Won’t Go In
Problem: The ground is too hard or rocky.
Solution: If possible, try to find a slightly softer spot within your chosen area. If not, you might need a more robust stake (e.g., rebar stakes) and a heavier hammer. If stakes are impossible, you must use weights. Ensure you have enough to safely secure the tent.
Tent Feels Unstable in Wind
Problem: The tent is swaying or feels like it might lift.
Solution: Immediately reinforce all anchor points. Add more stakes, use longer guy ropes, or increase the weight. If the wind is severe, it may be safer to take the tent down until conditions improve. Always prioritize safety. If you’re concerned about wind, investing in a sturdy pop-up tent designed for wind resistance is crucial, and reading our guide on the best pop-up tent for wind can provide further insights.
Conclusion
Setting up a party tent is a rewarding task that can transform your outdoor space into the perfect venue for any celebration. By following these steps – from careful preparation and site selection to meticulous assembly and secure anchoring – you can ensure your tent is set up correctly, safely, and efficiently. Remember, a little planning and attention to detail go a long way. So, gather your helpers, follow the instructions, and get ready to enjoy your perfectly pitched party tent and a fantastic event! For more information on selecting the right tent for your needs, you might find our reviews on the best pop-up tent reviews helpful.