
Discover how to effectively remove mold from your tent with this comprehensive guide. We’ll walk you through safe and practical cleaning methods, from gentle solutions to tougher scrubbing techniques. Learn to identify mold, choose the right cleaning agents, and implement preventative measures to keep your tent mold-free for future adventures.
**How to Remove Mold from a Tent**
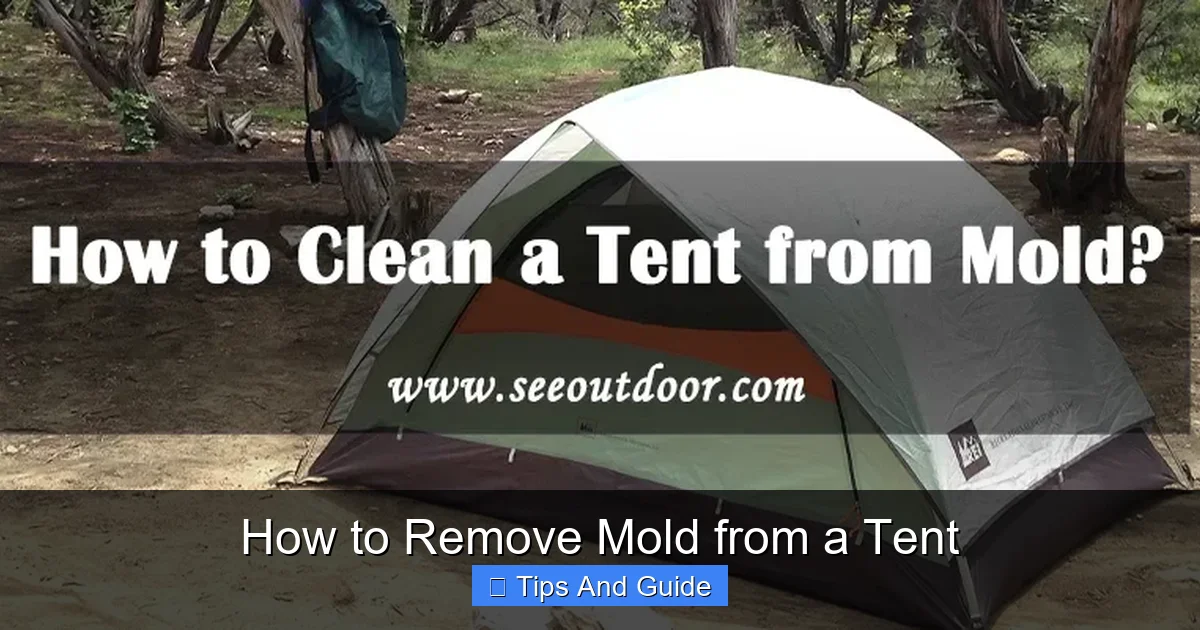
There’s nothing quite like the freedom of camping. Setting up your tent, breathing in the fresh air, and enjoying nature – it’s an experience many of us cherish. But what happens when you pull your trusty tent out of storage, only to find unwelcome fuzzy green, black, or white spots growing on its fabric? Mold. It’s a common problem, especially if your tent wasn’t stored completely dry. But don’t despair! This guide will provide you with everything you need to know to effectively remove mold from your tent, restore it to its former glory, and prevent it from coming back.
We understand that your tent is an investment, and a moldy one can be disheartening. That’s why we’ve put together this comprehensive, easy-to-follow guide. You’ll learn how to safely and effectively tackle mold growth, ensuring your tent is ready for your next outdoor adventure.
Key Takeaways
- Identify the Mold and Assess Damage: Before cleaning, determine the extent of the mold growth and check for any fabric damage.
- Gather Your Supplies: Collect appropriate cleaning solutions, brushes, cloths, and drying equipment to ensure a thorough clean.
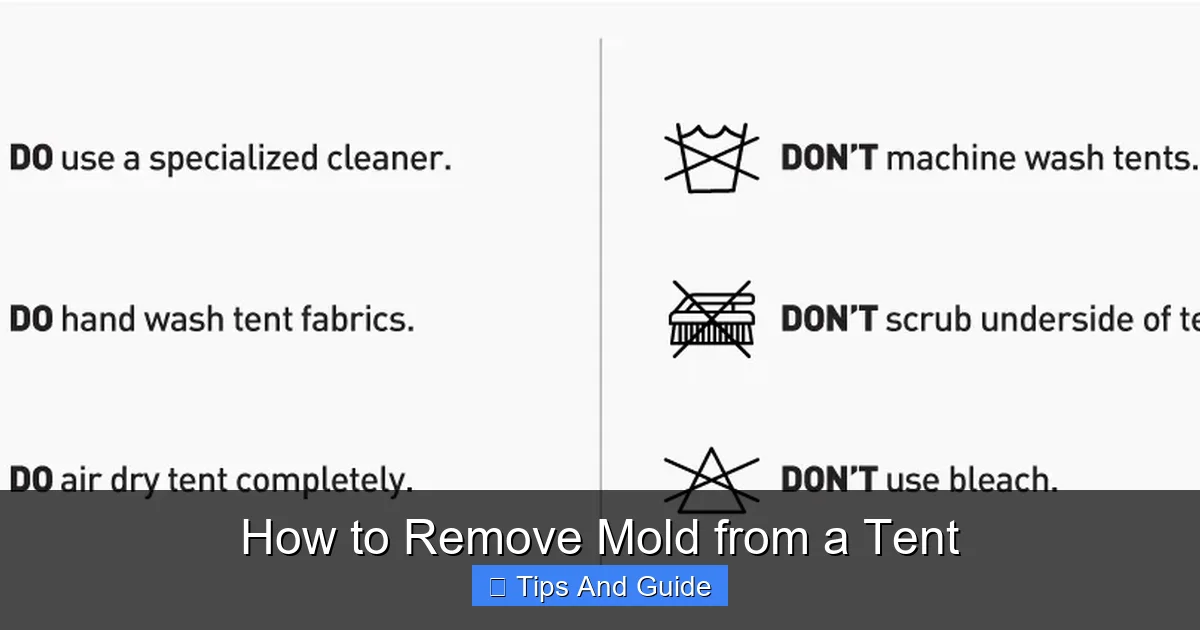
- Choose the Right Cleaning Solution: Opt for gentle, tent-safe cleaners like diluted vinegar, specialized tent cleaners, or mild soap and water. Avoid harsh chemicals.
- Clean in a Well-Ventilated Area: Always work outdoors or in a well-ventilated space to avoid inhaling mold spores and fumes from cleaning solutions.
- Follow a Step-by-Step Cleaning Process: This includes pre-rinsing, applying the cleaner, scrubbing gently, rinsing thoroughly, and allowing the tent to dry completely.
- Prevent Future Mold Growth: Proper drying, storage, and regular ventilation are crucial to prevent mold from returning.
Understanding Tent Mold
Before we dive into the cleaning process, it’s important to understand what you’re dealing with. Mold is a type of fungus that thrives in damp, dark, and poorly ventilated environments. Tents, often packed away while still damp after a trip, are prime candidates for mold growth.
What Does Tent Mold Look Like?
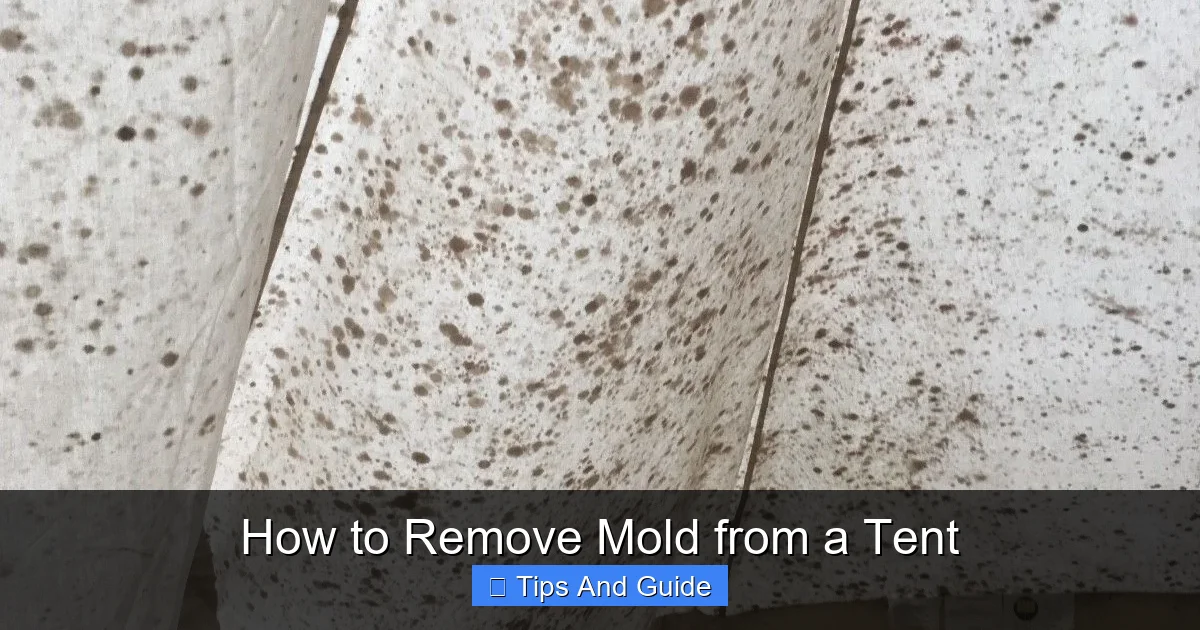
Tent mold can appear in various colors: black, green, white, or even a fuzzy gray. You might notice it as spots, patches, or a general discoloration of the tent fabric. It often comes with a musty, earthy odor.
Why is Tent Mold a Problem?
Beyond the unsightly appearance and unpleasant smell, mold can actually damage your tent’s fabric over time. It can weaken seams, break down waterproof coatings, and, in severe cases, cause permanent staining or deterioration. Furthermore, mold spores can be harmful to your health, especially if you have allergies or respiratory sensitivities.
Step-by-Step Guide to Removing Mold from Your Tent
Removing mold from your tent requires a methodical approach. It’s important to be patient and thorough. Here’s how to do it:
Step 1: Prepare Your Workspace and Gather Supplies
Safety and preparation are key before you begin any cleaning.
Choose a Suitable Location
Work outdoors or in a very well-ventilated garage or area. You’ll be using cleaning solutions, and it’s crucial to avoid inhaling mold spores and chemical fumes. Sunlight is also your friend for drying later, so a sunny spot is ideal.
Gather Your Cleaning Arsenal
You’ll need:
* A soft-bristled brush (an old toothbrush or a soft scrub brush works well)
* Clean cloths or sponges
* Buckets for water and cleaning solutions
* A hose or spray bottle for rinsing
* Mild soap (dish soap or a specialized tent cleaner)
* White vinegar
* Optional: A tent-specific mold remover (follow product instructions carefully)
* Rubber gloves and eye protection (for safety)
Step 2: Initial Inspection and Dry Brushing
Before applying any liquids, it’s best to assess the situation and remove loose mold.
Inspect the Tent Thoroughly
Lay your tent out flat and carefully examine all surfaces – inside and out, including seams, zippers, and corners. Note the extent of the mold growth.
Gently Brush Away Dry Mold
Using your dry, soft-bristled brush, gently brush away any loose mold spores. Do this carefully to avoid spreading them further. Try to brush them directly into a trash bag or an area where they can be easily contained and disposed of.
Step 3: Choose Your Cleaning Solution
The choice of cleaning solution depends on the severity of the mold and the type of tent fabric. Always test any solution on an inconspicuous area first.
Option 1: White Vinegar Solution (Effective and Natural)
White vinegar is a natural disinfectant and is very effective against mold.
* Mix equal parts white vinegar and water in a bucket or spray bottle.
* This solution is generally safe for most tent fabrics, but it’s always good to test it first.
Option 2: Mild Soap and Water
For very light mold or as a first step.
* Mix a few drops of mild dish soap with water.
* This is the gentlest option but might not be strong enough for stubborn mold.
Option 3: Specialized Tent Mold Remover
If you have a significant mold problem, a commercial tent mold remover might be necessary.
* Always purchase a product specifically designed for cleaning tents.
* Read and follow the manufacturer’s instructions precisely. These can be very potent.
Avoid using bleach or harsh chemical cleaners. Bleach can damage the fabric’s waterproof coating, fade colors, and degrade the material. It can also be harmful if inhaled in an enclosed space.
Visual guide about How to Remove Mold from a Tent
Image source: cdn.shopify.com
Visual guide about How to Remove Mold from a Tent
Image source: i2.wp.com
Visual guide about How to Remove Mold from a Tent
Image source: i.pinimg.com
Step 4: Apply the Cleaning Solution and Scrub
Now it’s time to tackle the mold head-on.
Apply the Solution Generously
Using a cloth, sponge, or spray bottle, apply your chosen cleaning solution to the moldy areas. Make sure to saturate the affected spots.
Scrub Gently
Using your soft-bristled brush, gently scrub the moldy areas. Work in circular motions. Be firm but avoid scrubbing too hard, as you don’t want to damage the fabric. For stubborn spots, you might need to let the solution sit for a few minutes before scrubbing again.
Clean Seams and Zippers
Pay special attention to seams and zippers, as mold often hides in these crevices. Use an old toothbrush for these areas.
Step 5: Rinse Thoroughly
This is a critical step to ensure no cleaning residue remains.
Rinse with Clean Water
Using a hose or a spray bottle filled with clean water, rinse the tent thoroughly. Make sure to get all the soap or vinegar residue out. Leftover residue can attract dirt and lead to future mold growth.
Repeat if Necessary
If you still see signs of mold or smell that musty odor, you may need to repeat the cleaning and rinsing process.
Step 6: Dry the Tent Completely
Drying is arguably the MOST important step in preventing mold from returning.
Air Dry in Sunlight
Hang your tent up outdoors in direct sunlight. Sunlight is a natural disinfectant and helps kill any remaining mold spores. Ensure good airflow around the tent. Leave it up for at least 24-48 hours, or until you are absolutely certain it is bone dry.
Check All Areas
Make sure all parts of the tent are dry, including the underside, seams, and corners. Open all doors and windows to allow for maximum ventilation.
If Sunlight Isn’t an Option
If you can’t dry it in the sun, hang it in a well-ventilated indoor space for an extended period. A fan can help circulate air.
Step 7: Waterproofing (Optional but Recommended)
After a thorough cleaning, especially if you used a stronger cleaner or notice any degradation of the waterproof coating, it’s a good idea to re-waterproof your tent.
Inspect the Waterproofing
Check if water still beads up on the fabric. If it soaks in, it’s time for re-waterproofing.
Apply a Tent Waterproofer
Purchase a reputable tent waterproofing spray or liquid. Follow the product instructions carefully. Apply it evenly to the exterior fabric and allow it to dry completely.
Preventing Future Mold Growth
The best way to deal with mold is to prevent it in the first place. Here are some essential tips:
1. Always Dry Your Tent Completely Before Storing
This is the golden rule. After every camping trip, no matter how short, set up your tent at home and let it air dry completely. Ensure all surfaces, seams, and zippers are dry. If you get caught in the rain, try to dry it as soon as you get back, even if it means setting it up in your living room or garage.
2. Store Your Tent Properly
* **Loose Storage:** Never store your tent tightly packed in its stuff sack for long periods. This restricts airflow and can encourage mold. If possible, store it loosely in a breathable bag or a large cotton tote.
* **Dry Location:** Store your tent in a cool, dry place. Avoid damp basements or attics where humidity levels can be high. A closet or shelf in a climate-controlled room is ideal.
3. Ventilate Your Tent Regularly
Even if you think your tent is dry, it’s a good practice to take it out and air it out periodically, especially if it’s been stored for a long time. This helps prevent moisture buildup.
4. Use a Ground Tarp
A ground tarp or footprint placed under your tent can help protect it from moisture rising from the ground, reducing the chance of dampness seeping into the tent floor. This also keeps the bottom of your tent cleaner. Looking for the right accessories can make a big difference; consider a quality [best camping mat for tent](https://tentrm.com/best-camping-mat-for-tent/) to add an extra layer of protection.
5. Clean Spills Immediately
If you spill drinks or food inside your tent, clean it up promptly. Food particles can be a food source for mold.
6. Consider Tent Accessories
For extended camping trips or humid environments, consider using a small, battery-powered [best camping fan for tent](https://tentrm.com/best-camping-fan-for-tent/) to help circulate air inside the tent.
Troubleshooting Common Tent Mold Issues
Sometimes, stubborn mold can be challenging. Here are a few extra tips:
Stubborn Stains
If mold has left permanent stains, don’t worry too much. The fabric’s integrity is more important than a cosmetic blemish. However, for very persistent stains, you might try a slightly stronger concentration of vinegar or a specialized cleaner, always testing first.
Mold on Zippers
Mold can be particularly tenacious on metal or plastic zippers. Use an old toothbrush with your cleaning solution and work it into the teeth. Lubricate the zipper afterward with a silicone-based zipper lubricant to ensure smooth operation.
Damage to Waterproof Coating
If the mold has clearly damaged the tent’s waterproof coating, you’ll need to reapply a waterproofing treatment. This is essential for keeping your tent functional and comfortable.
Conclusion
Dealing with mold on your tent might seem daunting, but with the right approach, it’s a manageable problem. By following these steps, you can effectively remove mold, restore your tent, and enjoy many more adventures outdoors. Remember that prevention is key. Always ensure your tent is dry before storing, store it in a suitable environment, and ventilate it regularly. A well-cared-for tent will serve you reliably for years to come. Happy camping!