
Ready to elevate your next sleepover? This comprehensive guide provides step-by-step instructions and creative ideas for making amazing slumber party tents right at home. Learn how to transform any room into a magical fort, ensuring a fun and memorable experience for all the kids. From simple DIY structures to decorating tips, you’ll have everything you need to create an unforgettable sleepover adventure.
Slumber parties are a rite of passage for many kids, filled with giggles, secrets, and sugary treats. What makes a slumber party truly unforgettable? A magical slumber party tent, of course! Transforming a regular room into a cozy, enchanting fort is easier than you think. This guide will walk you through everything you need to know to create the ultimate DIY slumber party tents that will have your little ones buzzing with excitement. Get ready to unleash your inner architect and decorator as we dive into the wonderful world of sleepover forts!
Key Takeaways
- DIY Slumber Party Tents are a Fantastic Way to Create a Magical Sleepover Atmosphere: They add an element of adventure and excitement, making the event extra special for kids.
- You Can Use Common Household Items to Build Your Tents: Think chairs, tables, blankets, sheets, and pillows – readily available items can become the foundation of your fort.
- Safety and Stability are Key Considerations: Ensure your tent structure is secure to prevent collapses and that there are no tripping hazards.
- Comfort is Essential for a Good Night’s Sleep (or at least attempting to!): Soft bedding, like pillows and blankets, and comfortable sleeping surfaces are crucial.
- Personalization and Decoration Make the Tent Unique: Encourage kids to help decorate, adding their personal touch with fairy lights, drawings, and stuffed animals.
- Plan for Entertainment Within the Tent: Think about activities like storytelling, movie watching, or playing quiet games inside the cozy confines.
- Easy Cleanup is a Bonus: Most DIY tents can be dismantled without much fuss, making post-party cleanup manageable.
Why Make Slumber Party Tents?
Before we get building, let’s talk about why these tents are such a big deal for sleepovers. They’re more than just a place to sleep; they’re an experience!
A slumber party tent instantly elevates a regular sleepover into an adventure. It provides a sense of privacy and a special “clubhouse” feel that kids absolutely adore. This dedicated space encourages imaginative play, storytelling, and bonding. Plus, it gives parents a bit of breathing room knowing the kids have their own designated zone for fun and sleep.
Planning Your Slumber Party Tent
Every great project starts with a plan. For your slumber party tent, consider these points before you gather your supplies.
Assess Your Space
First, look at the room where the slumber party will be held. Do you have a large living room, a spacious bedroom, or maybe even a playroom? The size of the space will dictate how big your tent can be and what kind of structure you can build. Measure the available floor area to get a clear idea of your footprint.
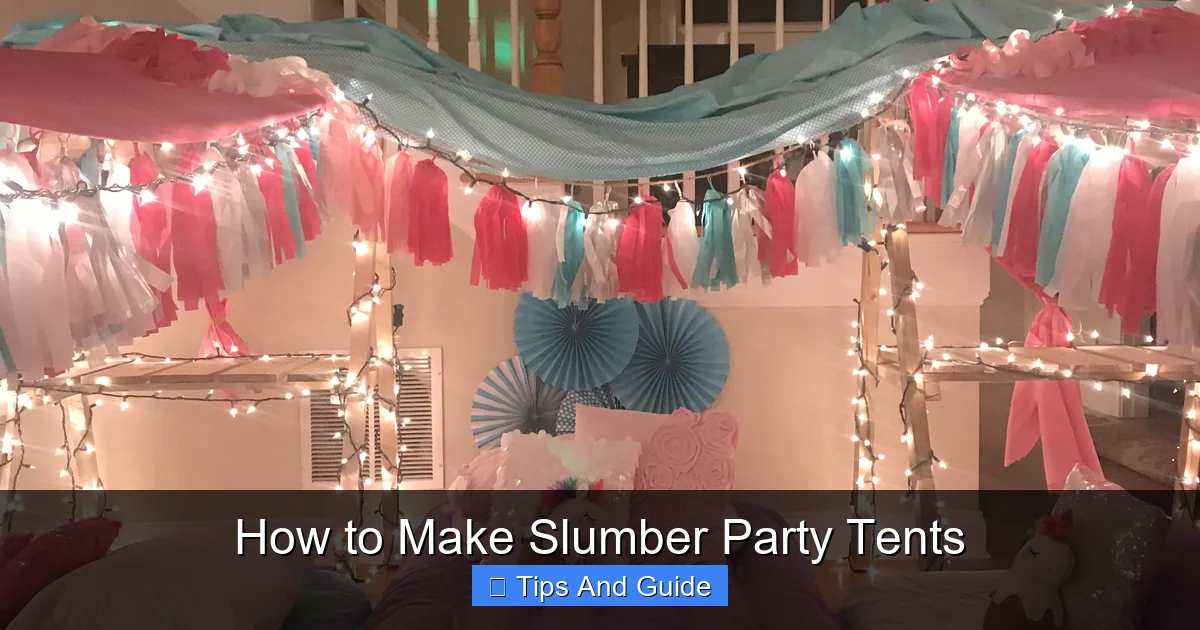
Visual guide about How to Make Slumber Party Tents
Image source: i.pinimg.com
Decide on the Tent Style
There are many ways to construct a slumber party tent. Here are a few popular styles:
- The Classic Blanket Fort: This is the simplest and most common. It uses furniture as supports and blankets or sheets as walls and a roof. It’s quick to set up and take down.
- The Chair Fort: Similar to the blanket fort, but specifically uses chairs arranged closely together to form the framework.
- The Table Fort: Drape sheets and blankets over a dining table or coffee table for an instant, low-profile tent.
- The Frame Tent: For something a bit more robust, you can use PVC pipes, cardboard boxes, or even actual tent poles to create a more structured frame.
Gather Your Supplies
Once you have a style in mind, it’s time to collect your materials. You probably have most of what you need around the house!
Essential Building Materials:
- Sheets and Blankets: Lightweight sheets are great for the roof as they don’t weigh down the structure. Heavier blankets can be used for walls or added coziness. More is always better!
- Furniture: Chairs (dining chairs, armchairs, beanbags), sofas, tables, and even sturdy ottomans can serve as anchors and supports.
- Clips and Fasteners: Clothespins, binder clips, safety pins, and even strong tape (painter’s tape is good for not damaging furniture) are invaluable for securing fabric.
- Optional Frame Materials: If you’re going for a more structured tent, consider PVC pipes and connectors, large cardboard boxes, or even sturdy broom handles.
Comfort and Decoration Supplies:
- Pillows: Lots and lots of pillows! For sleeping and for lounging inside.
- Sleeping Bags and Extra Blankets: Make sure everyone has a comfy place to sleep. Consider checking out our guide on best camping pads for tents for added comfort, especially if building on a hard floor.
- Lighting: Fairy lights, battery-operated lanterns, or LED string lights are perfect for creating a magical ambiance. Avoid anything that gets hot.
- Decorations: Balloons, streamers, drawings made by the kids, stuffed animals, and glow sticks can personalize the space.
Step-by-Step: Building Your Slumber Party Tent
Let’s get building! We’ll cover a few popular methods.
Method 1: The Classic Blanket Fort (Beginner Friendly)
This is the go-to for a reason – it’s easy, fun, and uses what you have.
Step 1: Arrange Your Furniture Supports
Position your furniture to create the basic shape of your tent. Think about a central area where the kids will sleep. Arrange chairs facing each other, with the backs towards the center. You can also use the backs of sofas or the edges of tables. Leave an opening for an entrance.
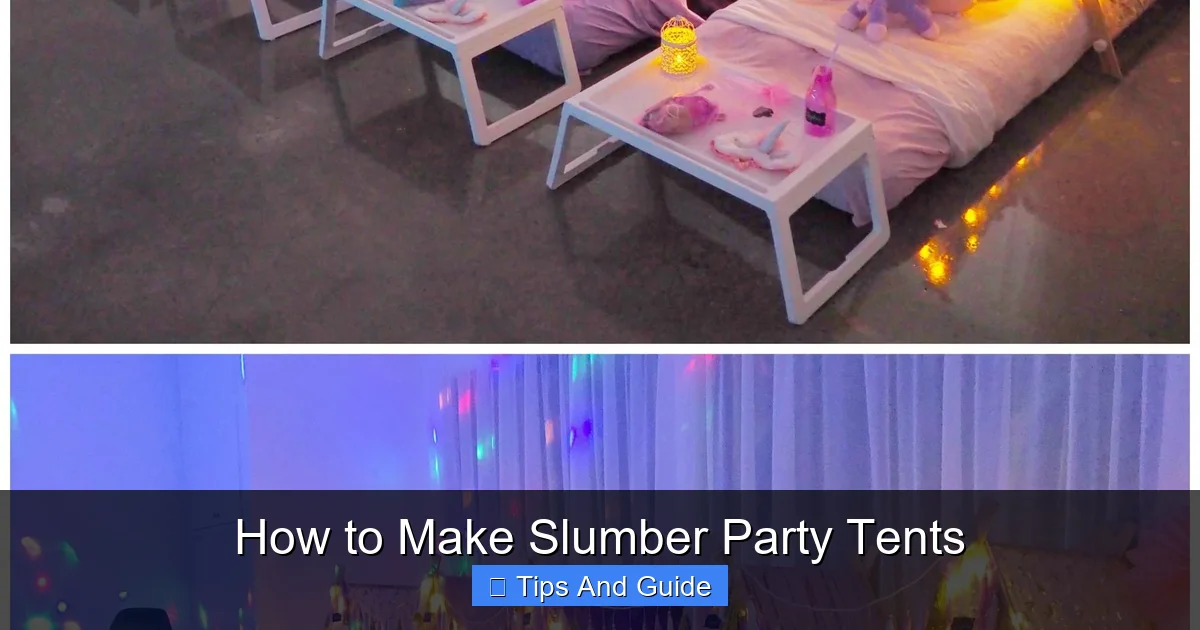
Visual guide about How to Make Slumber Party Tents
Image source: pagingfunmums.com
Step 2: Drape Your Sheets and Blankets
Start draping your sheets and blankets over the furniture. Use lighter sheets for the roof, as they are less likely to sag. Drape them so they meet in the middle and cover the sides. Overlap them to prevent gaps.
Step 3: Secure the Fabric
This is where your clips and fasteners come in. Use clothespins or binder clips to attach the fabric to the furniture. You can also tuck fabric under cushions or use safety pins for a more secure hold (be cautious with safety pins, especially if younger children are involved).
Step 4: Create an Entrance
Decide where you want the entrance to be. You can simply leave a gap between two draped sheets, or create a flap by layering two sheets that can be pulled aside.
Step 5: Reinforce and Adjust
Check for any sagging areas or gaps. You might need to add more clips or rearrange furniture slightly. If you have a very large space, you might need to use more furniture or even use something like a laundry basket or sturdy box to prop up the center of a sheet.
Method 2: The Sturdy Frame Tent (Intermediate)
If you want something a bit more durable and less reliant on specific furniture arrangements, a frame tent is a great option.
Step 1: Construct the Frame
If using PVC pipes, cut them to your desired lengths and connect them using the appropriate elbows and T-joints to create a cube or dome shape. If using cardboard boxes, you can tape them together to form walls and a roof structure. Ensure the structure is stable and can stand on its own.
Step 2: Drape and Secure the Fabric
Once your frame is built, drape your sheets and blankets over it. Use clips, tape, or even large safety pins to secure the fabric to the frame. Make sure to cover all sides and the top.
Step 3: Create an Entrance and Windows (Optional)
You can cut out openings for doors and windows, or simply leave sections of fabric that can be pulled aside. If you cut openings, consider reinforcing the edges with tape.
Step 4: Add Internal Support (If Needed)
For very large tents, you might need to add internal supports to prevent sagging. This could be as simple as placing a sturdy cardboard tube or a mop handle vertically in the center.
Method 3: The Table Tent (Quick & Easy)
Perfect for younger kids or smaller sleepovers.
Step 1: Prepare Your Table
Clear off your dining table or a large coffee table. Make sure there are no sharp edges exposed. If using a coffee table, ensure it’s low enough for easy access.
Step 2: Drape Fabrics
Drape sheets and blankets over the edges of the table. Let them hang down to create the walls of your tent. You might need to use a few clothes pins to keep them in place if the fabric keeps slipping.
Step 3: Create an Entrance
Simply leave a gap at one end by not draping the fabric all the way around, or overlap two sheets to create a pull-aside entrance.
Step 4: Furnish the Interior
Toss in some pillows and sleeping bags. This tent is best for younger children who can comfortably sit and sleep within the table’s height. Consider placing some best camping mats for tents on the floor inside for extra comfort.
Decorating and Personalizing Your Tent
This is where the real magic happens! Get the kids involved in making their tent a unique and special place.
Lighting the Way
Ambiance is key! String fairy lights around the inside of the tent for a twinkling, magical feel. Battery-operated lanterns are also a great choice for safe, portable lighting. Avoid using plug-in lights or anything that generates heat, and always supervise children around any light sources.
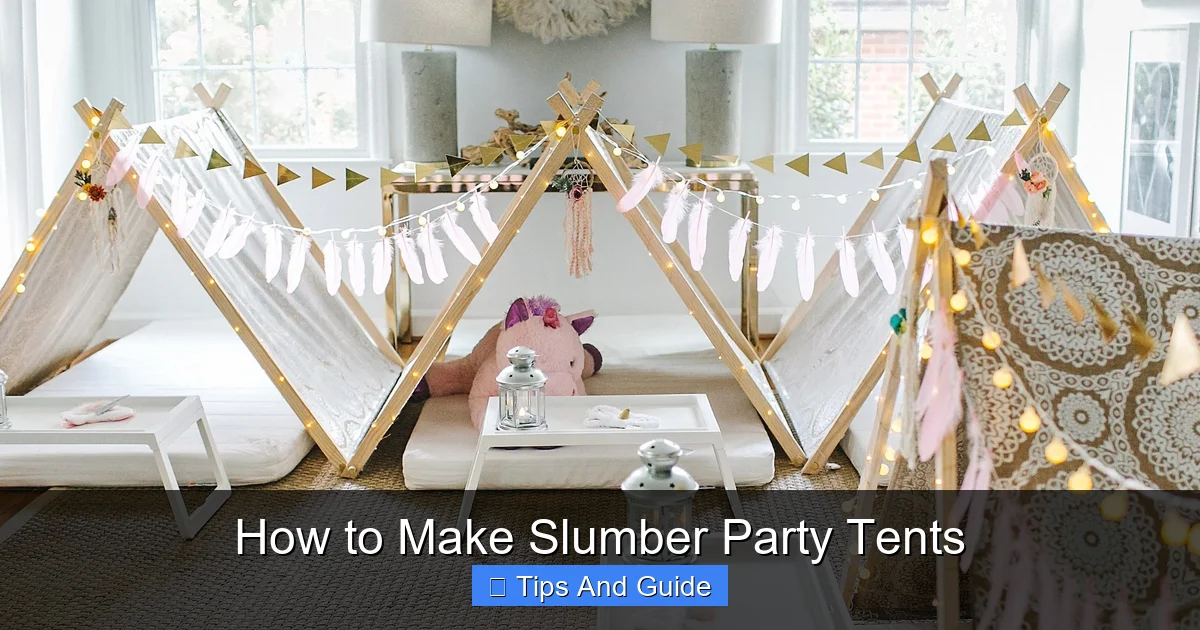
Visual guide about How to Make Slumber Party Tents
Image source: i.pinimg.com
Comfort is King (or Queen!)
Pile in the pillows! Floor pillows, couch cushions, and extra bed pillows make the inside super cozy. Sleeping bags are essential, but you can also layer blankets on the floor for added comfort. If you’re building on a hard floor, a thick rug or some extra padding can make a huge difference. Many parents find that having comfortable sleeping surfaces is as important as the tent itself; take a look at options for best camping beds for tents for inspiration.
The Personal Touch
Let the kids decorate! They can draw pictures to tape to the inside walls, bring their favorite stuffed animals, or hang lightweight streamers and balloons. Glow sticks are always a hit for a bit of extra nighttime fun.
Activities for Inside the Tent
Once the tent is built and decorated, what will the kids do inside?
The tent is the perfect cozy spot for:
- Storytelling: Dim the lights and tell spooky or funny stories.
- Movie Time: If you have a portable projector or a tablet, a movie night inside the tent is a classic.
- Board Games and Card Games: Smaller games work best in a confined space.
- Crafts: Simple crafts like friendship bracelets or decorating cookies can be fun.
- Just Chilling: Sometimes, the best activity is simply lounging, chatting, and enjoying their special space.
Safety First!
When building and enjoying your slumber party tents, safety should always be a top priority.
- Stability: Ensure the furniture and any frames are stable and won’t tip over. Avoid stacking furniture too high.
- Ventilation: Make sure there’s enough airflow. Don’t completely seal off the tent, and keep the entrance partially open.
- Fire Safety: Absolutely no open flames (candles, lighters). Use only battery-operated lights. Keep the tent away from heat sources.
- Trip Hazards: Be mindful of any stray blankets or cords that could cause someone to trip.
- Adult Supervision: Always supervise young children, especially when they are inside or around the tent structure.
Troubleshooting Common Tent Problems
Even the best-laid plans can hit a snag. Here are some common issues and how to fix them:
Problem: The Fabric Keeps Slipping
Solution: Use more clips, binder clips, or even fashion the fabric into loops that can be tied around chair legs or other furniture parts. Heavy-duty tape (like gaffer tape or painter’s tape if you’re worried about furniture finish) can also help secure edges.
Problem: The Tent is Sagging in the Middle
Solution: Add a central support. This could be another chair placed strategically, a tall vase, a sturdy cardboard tube, or even a broom handle propped up. You can also try adjusting the draping of your sheets to create more tension.
Problem: Not Enough Room
Solution: If space is limited, consider a smaller tent design, like the table tent or a single-person “personal fort” using just a few chairs and a blanket. Alternatively, you might need to consolidate furniture or use vertical space more effectively by extending fabric up higher.
Problem: The Entrance is Awkward
Solution: Get creative! You can tie back the fabric like curtains, use Velcro strips for a cleaner closure, or even attach a lightweight shower curtain ring to create a simple doorway.
Conclusion
Creating slumber party tents is a wonderful way to add a touch of magic and adventure to any sleepover. With a little imagination and a few simple materials, you can build a cozy, personalized fort that your kids will talk about for years to come. Remember to plan ahead, involve the kids in the decoration process, and always prioritize safety. So, gather your blankets, your clips, and your sense of fun – it’s time to build some amazing slumber party tents and create lasting memories!