
Elevate your camping experience with a well-placed tarp! Learning the best way to hang a tarp over your tent provides crucial protection from rain, sun, and wind, ensuring a more comfortable and dry shelter. This guide will walk you through essential techniques, materials, and setup strategies for optimal weatherproofing.
Heading out into the great outdoors is an incredible experience. The fresh air, the starry nights, the sense of freedom – it’s all part of the magic. But as any seasoned camper knows, unpredictable weather can quickly turn a dream trip into a damp or sun-scorched ordeal. That’s where a simple piece of fabric can become your best friend: a tarp. Hanging a tarp over your tent isn’t just a nice-to-have; it’s often a necessity for truly enjoying your time in nature, no matter what the sky decides to do.
Think of your tent as your cozy sleeping quarters. Now, imagine a sturdy, waterproof roof extending over that, providing an extra layer of defense. That’s precisely what a well-hung tarp does. It shields your tent from direct rainfall, preventing leaks and keeping your gear dry. It offers shade during hot, sunny days, making your tent a more bearable space. And when the wind picks up, a strategically placed tarp can break its force, reducing the strain on your tent poles and seams. Mastering the best way to hang a tarp over your tent is a fundamental camping skill that significantly enhances your comfort and peace of mind.
This guide is designed to make that skill accessible to everyone, from first-time campers to those looking to refine their setup. We’ll cover everything you need to know, from selecting the right gear to the most effective methods for getting that tarp up and working hard for you. So, let’s dive in and ensure your next camping adventure is as comfortable and protected as possible!
- A tarp provides essential extra protection: It acts as a barrier against rain, sun, and wind, keeping your main tent dry and you comfortable.
- Choose the right tarp and accessories: Opt for a waterproof tarp with reinforced grommets and bring sturdy stakes, cordage, and optionally, trekking poles or extra poles.
- Proper tension is key: A taut tarp prevents water pooling and flapping in the wind, maximizing its effectiveness and durability.
- Consider the wind direction: Angle your tarp to deflect the prevailing wind, minimizing its impact on your tent.
- Secure anchor points are vital: Use trees, sturdy bushes, or ground stakes to create strong attachment points for your tarp.
- Master essential knots: Knowing a few reliable knots like the taut-line hitch and bowline will make your setup secure and adjustable.
- Practice makes perfect: Set up your tarp at home before your trip to get comfortable with the process and identify any potential issues.
📑 Table of Contents
Why Hang a Tarp Over Your Tent?
Before we get into the “how,” let’s really understand the “why.” Sometimes, the simplest additions make the biggest difference, and a tarp is a prime example. It’s a versatile piece of equipment that offers a multitude of benefits.
Superior Weather Protection
The most obvious reason is protection. Your tent is designed to be waterproof, but adding a tarp creates a double barrier.
- Rain: A tarp diverts the bulk of the rainwater away from your tent’s rainfly. This is especially crucial during heavy downpours. It minimizes the amount of water that can seep through seams or potentially overwhelm your tent’s waterproofing over time.
- Sun: On a hot, sunny day, a tarp acts like an awning. It blocks direct sunlight from hitting your tent, keeping the interior significantly cooler. This can make a huge difference in comfort, especially if you’re camping in a warm climate or during the summer.
- Wind: While your tent is built to withstand wind, a tarp can provide an additional buffer. By pitching it strategically, you can create a windbreak, reducing the force of gusts that hit your tent directly. This not only keeps you more comfortable but also reduces stress on your tent’s structure.
Extended Living Space
A tarp isn’t just for overhead protection. It can create a usable outdoor living area.
- Sheltered Area: With a tarp pitched above and open on the sides, you can create a dry, shaded space to cook, eat, play games, or just relax outside your tent. This is incredibly useful if the weather is inclement but you still want to enjoy the outdoors.
- Gear Storage: You can also use the tarped area to store muddy boots, wet rain gear, or cooking equipment, keeping your tent interior clean and dry.
Increased Tent Lifespan
Protecting your tent from the elements means it will last longer.
- UV Protection: Constant exposure to the sun’s UV rays can degrade tent fabric over time. A tarp shields your tent from this direct exposure, preserving its integrity.
- Reduced Wear and Tear: By taking the brunt of the rain and wind, the tarp helps reduce the wear and tear on your tent’s rainfly and poles.
Choosing the Right Tarp and Essential Gear
Not all tarps are created equal, and the right accessories can make or break your setup. Here’s what to look for:
Tarp Material and Size
For camping, you’ll want a durable, waterproof tarp.
- Material: Look for ripstop nylon, polyester, or polyethylene. Ripstop fabrics are designed to prevent small tears from spreading. Ensure it has a waterproof coating or is made from a material inherently resistant to water.
- Waterproofing: Check the hydrostatic head rating (HH). A higher HH means better waterproofing. For decent rain protection, aim for at least 1500mm. For heavy rain, 3000mm or more is ideal.
- Size: The size of your tarp will depend on how much coverage you need and the size of your tent. A common size for covering a standard two-person tent is around 8×10 feet (2.4×3 meters) or 10×12 feet (3×3.6 meters). For larger tents or more living space, consider 10×12 or 12×16 feet (3.6×4.8 meters). Too small, and it won’t offer enough protection; too large, and it can be difficult to manage and catch more wind.
- Reinforced Grommets: Ensure your tarp has sturdy grommets (metal rings) around the edges and possibly in the corners. These are your primary attachment points.
Essential Accessories
Don’t forget these crucial items:
- Cordage: You’ll need plenty of strong, non-stretching cordage or paracord. Aim for at least 50-100 feet (15-30 meters) depending on your tarp size and setup.
- Stakes: Sturdy tent stakes are essential for anchoring the tarp to the ground. Bring more than you think you’ll need, especially if you plan to use multiple anchor points.
- Carabiners or S-Hooks (Optional): These can make attaching your tarp to lines or poles quicker and easier.
- Trekking Poles or Extra Tent Poles (Optional): If you don’t have trees or other high anchor points readily available, trekking poles can be used to elevate the center of your tarp, creating a more spacious A-frame or lean-to structure.
- Guy Lines: Many tarps come with pre-attached guy lines, but having extra can be useful for adding stability.
Methods for Hanging Your Tarp
Now for the fun part – setting up your protective shelter! The “best way” often depends on your surroundings and the weather conditions.
The Lean-To Method
This is a simple and effective setup, ideal for creating a protected space alongside your tent.
How to set it up:
Visual guide about Best Way to Hang Tarp Over Tent
Image source: rusticaly.com
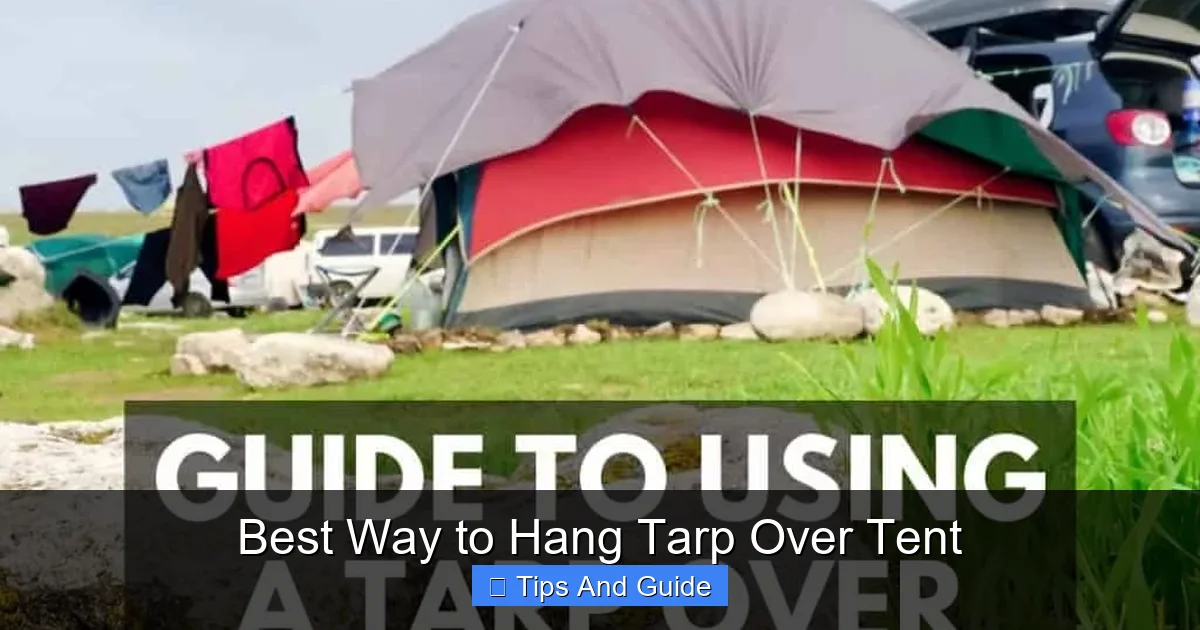
Visual guide about Best Way to Hang Tarp Over Tent
Image source: gearassistant.com
- Identify anchor points: Find two sturdy trees or posts roughly the length of your tarp apart, or one high anchor point (like a tree branch or a raised pole) and an anchor point on the ground.
- Attach the tarp: Tie one long edge of the tarp to one anchor point (e.g., a tree trunk). If using a single high anchor, tie one corner to that.
- Create tension: Pull the opposite edge of the tarp taut. Stake it down securely to the ground. If you used a single high anchor, pull the opposite side taut and stake it down to create a sloped roof.
- Add side stakes: Stake down the remaining corners or grommets along the bottom edge of the tarp to keep it taut and prevent wind from getting underneath.
Best for: Providing shelter from rain and sun coming from one direction, creating a covered porch area.
The A-Frame Method
This method creates a pitched roof, similar to a tent, and is excellent for shedding rain from all directions.
How to set it up:
- Find your supports: You’ll need two anchor points (trees, poles) spaced appropriately, or you can use two trekking poles or extra tent poles. The height of these supports will determine the pitch of your “roof.”
- Drape the tarp: Drape the tarp over the ridge line created by your supports, ensuring it’s centered.
- Secure the ridgeline: If using trees, tie a rope taut between them and drape the tarp over the rope. If using poles, tie the center of the tarp to the top of each pole.
- Stake out the sides: Pull the sides of the tarp taut and stake them down firmly to the ground. Use guy lines from the corners and any intermediate grommets to create tension and shape the A-frame.
Best for: Maximum rain and wind protection, especially in open areas where you might not have natural anchors.
The Diamond/Square Method
This setup provides a simple, low-profile shelter, often used for one or two people.
How to set it up:
- Choose your anchor points: You’ll need four anchor points, ideally at roughly the same height. These could be short stakes, rocks, or low branches.
- Attach corners: Attach each corner of the tarp to an anchor point using cordage.
- Adjust tension: Adjust the lengths of the cords to make the tarp taut. The goal is a flat, tight surface that will shed water effectively.
Best for: Minimalist setups, quick emergency shelter, or when you want a low profile against the wind.
Tips for Secure and Effective Setup
Beyond the basic methods, a few extra tips can make your tarp setup more robust and useful.
Master Essential Knots
Knowing how to tie a few good knots is crucial.
- Taut-Line Hitch: This is your best friend for adjustable guy lines. It allows you to tighten or loosen the line easily as needed, compensating for fabric stretch or temperature changes.
- Bowline Knot: Excellent for creating a secure loop that won’t slip. You can use it to tie your tarp to trees or other fixed objects.
- Clove Hitch: A quick and easy knot for temporarily securing a line to a pole or stake.
Practicing these knots at home before your trip will save you a lot of frustration at the campsite.
Pitching for the Wind
Consider the prevailing wind direction.
- Angle it: Position your tarp so its lowest side faces the wind. This helps deflect the wind over your tent rather than pushing directly against it.
- Low profile: For very windy conditions, a lower pitch or a more streamlined shape (like a simple lean-to with the lower edge close to the ground) will be more stable.
- Avoid creating sails: Large, flat surfaces can act like sails. Use guy lines to create tension and shape the tarp to minimize wind resistance.
Ensuring Proper Drainage
Water pooling on a tarp can be a problem.
- Create a slope: Always pitch your tarp with a significant slope. Water needs to run off quickly.
- Avoid sagging: Ensure there are no low spots where water can collect. Periodically check your guy lines for tension, especially after rain.
- Clear debris: If leaves or debris accumulate on the tarp, clear them to prevent water from being trapped.
Utilize Your Tent’s Features
Sometimes your tent itself can be part of the solution.
- Tent poles: If you have an extra tent pole or two, you can use them to create a more defined structure for your tarp, especially if trees aren’t available.
- Tent loops: Some tents have loops on the fly that can be used to help anchor or guide tarp lines.
Advanced Tarp Techniques and Considerations
Once you’ve mastered the basics, you might want to explore more advanced ways to use your tarp.
Creating an Extended Awning
This is perfect for maximizing living space.
How to do it: Pitch the tarp higher at the front and stake it out lower at the back, creating a large, covered area in front of your tent entrance. You can use trekking poles or poles to support the elevated edge. This setup is fantastic for cooking or dining in comfort, even if it’s drizzling. You might even consider a dedicated camping kitchen tent for more robust outdoor cooking setups, but a tarp can offer a surprisingly effective solution.
Using Tarp as a Ground Cloth
While not its primary purpose, a tarp can serve as an extra ground cloth.
When to use it: If you anticipate very wet ground, you can place a tarp beneath your tent. However, ensure the tarp is smaller than your tent’s footprint. If the tarp extends beyond the tent, it can channel water *under* your tent, defeating the purpose. If you want a dedicated ground layer, explore options for the best camping mat for tent or a purpose-built ground tarp.
Multi-Tarp Systems
For longer trips or group camping, you might consider using multiple tarps.
How it works: One tarp could cover the main sleeping area, while another is set up as a communal cooking and gathering space. This provides excellent separation and comfort for different activities. Think about how you’ll integrate these for maximum utility, perhaps connecting them or pitching them in close proximity.
Tarp Maintenance
Keep your tarp in good condition.
- Cleaning: After use, clean your tarp with water and mild soap. Avoid harsh detergents or abrasive brushes that can damage the waterproofing.
- Drying: Always dry your tarp completely before storing it to prevent mildew and mold growth.
- Repairs: Small tears can often be repaired with seam sealer or patch kits. Check your tarp for any damage before and after each trip.
Conclusion
Hanging a tarp over your tent is a skill that pays dividends in comfort and protection during any camping trip. Whether you’re battling a sudden downpour, seeking refuge from the relentless sun, or trying to escape a blustery wind, a well-pitched tarp is your reliable ally. By understanding your gear, practicing basic setups, and employing a few clever techniques, you can transform your camping experience. Remember to choose the right tarp, bring your essential accessories, and always consider the weather conditions when you’re setting up. Don’t forget to practice at home so you’re confident and efficient in the field. With a little effort, you’ll soon be a pro at the best way to hang a tarp over your tent, ensuring many more enjoyable nights under the stars, come what may. Happy camping!
Frequently Asked Questions
What is the best type of tarp for camping?
For camping, the best tarps are typically made from durable, waterproof materials like ripstop nylon, polyester, or polyethylene. Look for a high hydrostatic head rating (at least 1500mm for moderate rain, 3000mm+ for heavy rain) and reinforced grommets for secure attachment.
How do I prevent water from pooling on my tarp?
To prevent water pooling, ensure you pitch your tarp with a significant slope so water can run off freely. Always adjust guy lines to maintain tension and avoid any sagging spots, and clear any debris that might accumulate on the tarp’s surface.
Can I use a tarp as a ground cloth under my tent?
Yes, a tarp can be used as a ground cloth, but it’s crucial that it’s smaller than your tent’s footprint. If the tarp extends beyond your tent, it can collect rainwater and channel it underneath your tent, making things wetter. It’s often better to use a purpose-made ground sheet or a mat designed for this. For more on ground comfort, check out the best camping mat for tent.
How much cordage do I need for a tarp?
You’ll typically need at least 50-100 feet (15-30 meters) of strong cordage or paracord. The exact amount depends on the size of your tarp and the number of anchor points you plan to use, as well as how far you might need to reach trees or other supports.
Is it better to hang a tarp high or low over my tent?
The ideal height depends on your needs. A higher pitch offers more headroom and a larger covered living space but can catch more wind. A lower pitch provides better wind resistance and is good for sleeping, while a mid-height is often a good compromise. Consider the prevailing wind direction and pitch the lowest side towards it.
What knots are essential for setting up a tarp?
Essential knots for tarp setup include the taut-line hitch (for adjustable guy lines), the bowline knot (for secure loops), and the clove hitch (for quick temporary attachments). Practicing these beforehand will greatly improve your setup efficiency and security.