
Setting up a beach tent is a breeze with the right steps. This guide will walk you through everything from unpacking to securing your shelter. Learn to choose the perfect spot, assemble your tent with ease, and understand how to keep it stable. With these simple tips, you’ll be enjoying shade and protection on your next beach trip in no time.
How to Set Up Beach Tent
A day at the beach is one of life’s simple pleasures. The sun on your skin, the sound of the waves, and the salty air – it’s pure bliss. But let’s be honest, the sun can be intense, and finding a comfortable spot can be a challenge. That’s where a beach tent comes in! A beach tent provides essential shade, protects you from UV rays, and gives you a personal oasis on a crowded shore.
But what if you’re new to beach tents, or perhaps your current one seems a bit daunting to set up? Don’t worry! This comprehensive guide will walk you through every step of setting up your beach tent, from choosing the perfect spot to packing it away neatly. We’ll cover different types of beach tents and offer practical tips to ensure your beach day is as relaxing as possible. You’ll learn how to assemble it quickly, secure it against the wind, and make the most of your new beach shelter. Get ready to enjoy the sun safely and comfortably!
Key Takeaways
- Choose the Right Location: Select a spot away from the tide line and with minimal foot traffic for maximum comfort and safety.
- Unpack and Inspect: Before assembly, lay out all components to ensure everything is present and in good condition.
- Follow Manufacturer Instructions: Always refer to your specific tent’s manual, as designs can vary.
- Secure Your Tent Firmly: Use all provided stakes and sandbags, especially in windy conditions, to prevent your tent from blowing away.
- Proper Ventilation is Key: Open windows and doors to allow for airflow and prevent the tent from becoming too hot and stuffy.
- Dismantle with Care: Pack your tent neatly and dry to prolong its lifespan and make future setups easier.
1. Before You Go: Choosing Your Beach Tent
While this guide focuses on setup, a quick word on choosing the right tent is helpful. The best pop-up tent for the beach varies by need. Consider size, weight, ease of setup, and UV protection. For families, a larger model might be best, while a solo traveler might prefer a compact, lightweight option. If you’re looking for great options, checking out a best pop-up beach tent review can be a fantastic starting point.
2. Finding the Perfect Spot
The location of your beach tent is crucial for comfort and safety. It’s not just about finding an empty patch of sand!
H3: Assess the Tide Line
This is perhaps the most critical step. You do NOT want your tent to be washed away by the incoming tide. Observe the current water level and look for the high-tide mark (often indicated by a line of seaweed or debris). Set up your tent well behind this line. It’s always better to walk a little further from the water than to have your belongings get wet or lost.
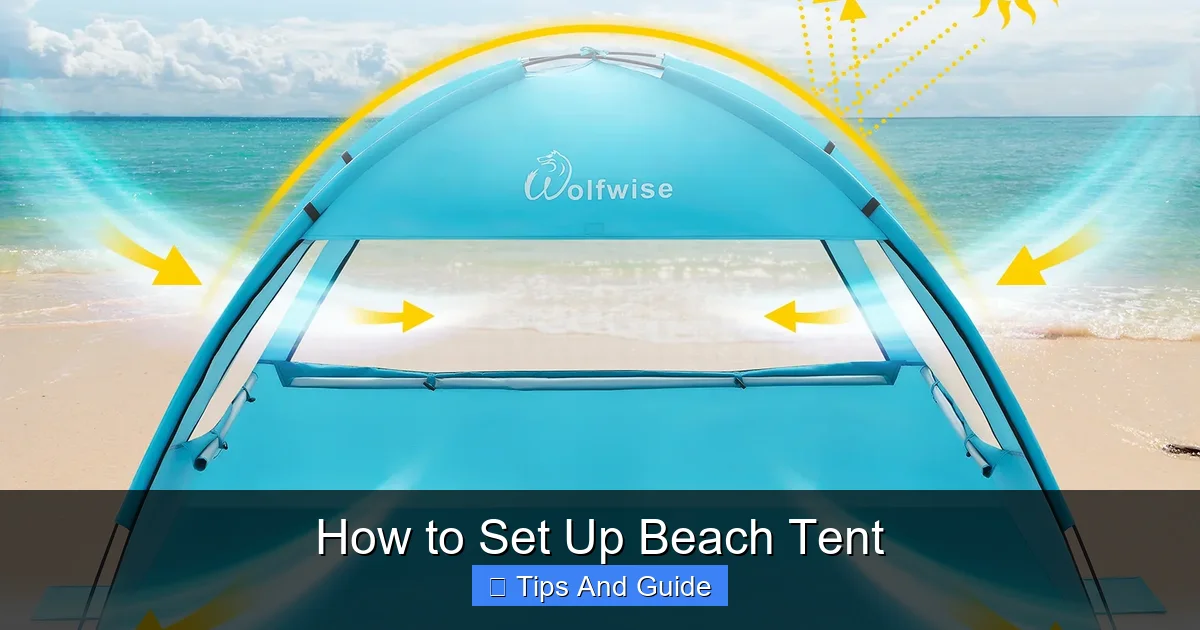
Visual guide about How to Set Up Beach Tent
Image source: wolfwise.com
H3: Consider Foot Traffic
Try to set up in an area where people won’t constantly be walking in front of or behind your tent. This gives you more privacy and peace. Look for quieter sections of the beach, especially during peak hours.
H3: Wind Direction and Shelter
Observe the prevailing wind direction. You might want to position your tent so that the entrance faces away from the wind, or set it up near natural windbreaks like dunes (but be mindful of protected areas) or larger rock formations. This can help prevent sand from blowing into your tent.
H3: Proximity to Amenities
Think about how close you want to be to restrooms, food vendors, or parking. Sometimes a short walk is worth the convenience. Balance your desire for quiet with your need for easy access.
3. Unpacking and Initial Setup
Once you’ve found your ideal spot, it’s time to get your tent ready for action.
H3: Open the Bag
Carefully open the carrying bag. Most beach tents come in a compact bag, often with a zipper. Remove the tent and all its accessories.
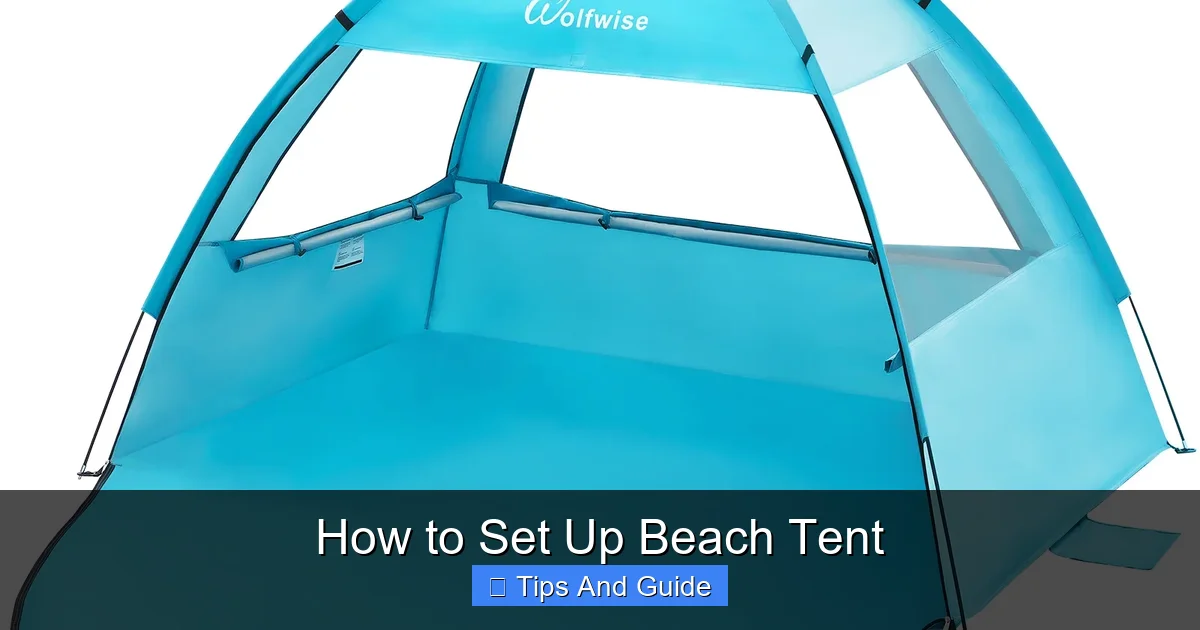
Visual guide about How to Set Up Beach Tent
Image source: wolfwise.com
H3: Lay Out All Components
Before you start assembling, spread out the tent fabric on the sand. Identify all the parts: the tent itself, poles (if any), stakes, guy lines, and any sandbags or anchors. Make sure you have everything listed in your tent’s instruction manual. It’s frustrating to discover a missing piece halfway through setup.
H3: Read the Instructions (Yes, Really!)
Even if you’ve set up a tent before, every model can be slightly different. Take a minute to glance at the manufacturer’s instructions. They are often printed on a small card or directly on the tent bag. For specific models, comparing them, like the Large 3 vs Wolfwise Pop Up Beach Tent Guide, can highlight unique setup features.
4. Assembling Your Beach Tent
The assembly process varies significantly depending on the type of beach tent you have. The most common types are pop-up tents and pole-frame tents.
H2: Pop-Up Tents: The Quickest Option
Pop-up tents are designed for speed and simplicity. They often have pre-attached poles that spring into place.
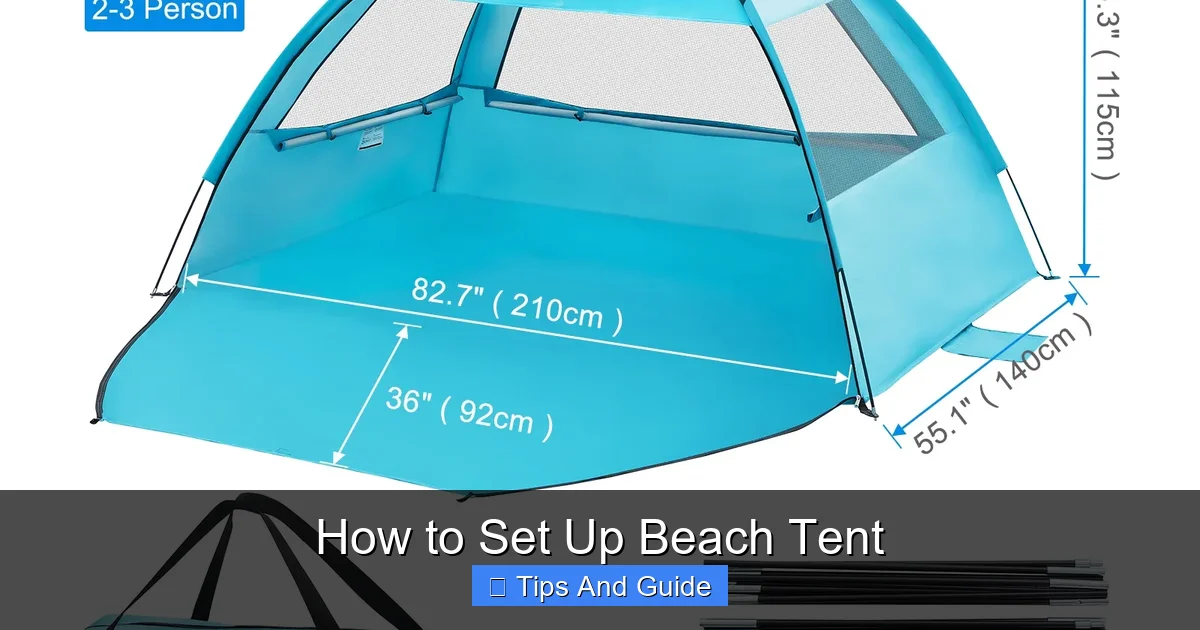
Visual guide about How to Set Up Beach Tent
Image source: wolfwise.com
H3: The “Pop” Action
For many pop-up tents, the main assembly involves unfolding the tent. Some require you to simply unfold them and let them expand. Others might have a central mechanism you need to push or pull. For example, some tents have a central hub where poles connect. You might need to push this hub up or down to lock the poles in place.
Example: Many popular beach tents work by twisting and folding. You’ll typically unfold the tent flat, then gather sections of the frame and twist them in opposite directions. This causes the tent to collapse into a compact disc shape, making it easy to store.
H3: Unfolding and Securing
Once your pop-up tent has sprung into its intended shape, lay it flat on the sand. You’ll then need to secure it. This usually involves using the provided stakes to anchor the corners. Many pop-up tents have loops or grommets at the base for this purpose.
H2: Pole-Frame Tents: A Little More Involved
These tents rely on separate poles that you insert into sleeves or clips on the tent fabric.
H3: Assembling the Poles
Beach tents with poles usually have shock-corded fiberglass or aluminum poles. These come in sections. Simply connect the sections together by pushing the ends into each other. The elastic cord inside will keep them together.
H3: Inserting Poles into Sleeves/Clips
Start by feeding the poles through the designated sleeves on the tent fabric. If your tent uses clips, attach these to the poles after the poles are in place. Begin with the main structural poles.
H3: Raising the Tent
Once the poles are in place, you’ll typically need to raise the tent. This might involve bending the poles to fit into grommets at the corners or base of the tent, or connecting them to a central hub. This step often requires a bit of gentle pressure. It’s usually easier with two people, but can be done solo.
H3: Attaching Additional Poles or Supports
Some larger or more complex beach tents might have additional poles for awnings or extra stability. Follow your instructions carefully for these.
5. Anchoring Your Beach Tent Securely
This is a vital step to ensure your beach tent doesn’t become a kite! Sand is light and easily moved by the wind.
H3: Using Stakes
Most tents come with stakes. For sand, you’ll want longer, wider stakes if possible, or specific sand stakes. Push the stakes firmly into the sand through the loops or grommets on the tent’s base. Angle them away from the tent for better grip.
H3: Sandbags and Anchors
Many beach tents come with sandbags. Fill these bags with plenty of sand. You can then place these bags over the tent’s base or tie them to the tent’s guy lines. Some tents have built-in pockets you can fill with sand. These are extremely effective in windy conditions.
Tip: Digging a small trench and burying the base of your tent or the sandbags can provide even more stability.
H3: Guy Lines
If your tent has guy lines (ropes that attach to the tent and stake out away from it), use them! These provide crucial extra support and prevent the tent from being lifted by the wind. Angle them outwards and stake them down securely.
H3: Adding Extra Weight
If you didn’t bring dedicated sandbags, you can use heavy objects like water bottles, coolers, or even large rocks to weigh down the base of your tent. Be careful not to damage the tent fabric.
6. Ventilation and Comfort
Once your tent is up and secure, you want to make it a pleasant place to be.
H3: Open Windows and Doors
Most beach tents are designed with mesh windows and doors. Open these up to allow for airflow. This is crucial for keeping the tent cool and preventing condensation. If one side is facing the wind, you might want to keep that opening partially closed to prevent sand from blowing in, while opening others for cross-ventilation.
H3: Using a Ground Tarp or Blanket
While the tent floor provides some protection, laying down a blanket, towel, or a dedicated ground tarp can make sitting or lying down more comfortable and help keep sand out.
H3: Staying Hydrated and Protected
Remember, even in the shade, you’re still exposed to reflected UV rays. Keep drinks handy and apply sunscreen regularly. If your tent offers excellent sun protection, it’s a great asset. For those seeking the absolute best, consulting a best pop-up shade tent for beach guide could be beneficial.
7. Taking Down Your Beach Tent
Packing up should be as straightforward as setting up.
H3: Clear the Interior
Remove all your belongings from inside the tent. Shake out any sand or debris from the floor.
H3: Release Tension
If your tent has tension poles, release the tension before attempting to collapse it. For pop-up tents, this usually means undoing the locking mechanism or simply preparing to twist the frame.
H3: Collapsing Pop-Up Tents
This can be the trickiest part for beginners. For most pop-up tents that spring open, you’ll need to reverse the process. Gather the tent and twist the frame until it collapses into a flat disc shape. It might take a few tries to get the hang of it. Look for the “folding” mechanism – often two opposite curves you bring together.
H3: Disassembling Pole Tents
Gently remove the poles from the sleeves or clips. Carefully bend the poles to allow them to come apart. Fold the tent fabric neatly.
H3: Packing into the Bag
Once the tent is collapsed or folded, carefully place it back into its carrying bag. Fold or roll it as tightly as possible to ensure it fits. If you have trouble, refer back to the manufacturer’s instructions. A well-packed tent is easier to carry and store.
H3: Dry Your Tent
If your tent got wet from the sea spray or you used it on a damp day, make sure it’s completely dry before storing it long-term. Dampness can lead to mildew and damage the fabric. Lay it out in your yard or a well-ventilated area at home until it’s thoroughly dry.
Troubleshooting Common Beach Tent Issues
H3: Tent is Blowing Away
Solution: You need more anchors! Use all provided stakes and sandbags. Dig trenches to bury the base or anchors. If it’s extremely windy, consider a heavier-duty tent specifically designed as a best pop-up beach tent for wind.
H3: Sand Getting Everywhere
Solution: Choose your spot wisely, further from the water’s edge. Keep doors and windows zipped up when not in use. A small brush or mat at the entrance can help.
H3: Tent is Too Hot
Solution: Maximize ventilation. Open all windows and doors. Position the tent to catch any breeze. Consider a tent with more mesh or lighter-colored fabric.
H3: Difficult to Fold/Collapse
Solution: Watch a video tutorial for your specific tent model. Practice in a non-windy environment. Don’t force it; there’s usually a specific way the frame needs to be manipulated.
Conclusion
Setting up a beach tent might seem like a chore, but with a little practice and by following these steps, you’ll become a pro in no time. The benefits – shade, UV protection, and a comfortable personal space – are well worth the effort. Remember to choose your location wisely, anchor your tent securely, and enjoy the day. Whether you have a simple pop-up or a more complex pole structure, these guidelines will help ensure a smooth and stress-free beach experience. So, grab your tent, head to the shore, and relax knowing you’ve got your perfect beach haven ready to go!