
Discover how to effortlessly set up your Neso tent with our comprehensive guide. We provide clear, step-by-step instructions, essential tips, and troubleshooting advice to ensure you enjoy your shade solution quickly and easily. Get your Neso tent up and ready for fun in no time!
Welcome to your ultimate guide on how to set up a Neso tent! If you’ve recently purchased a Neso tent or are planning to, you’re in for a treat. Neso tents are fantastic for providing shade at the beach, park, or any outdoor gathering. They are known for their portability and ease of use, but like any new piece of gear, a little guidance can make the process even smoother. This guide will walk you through every step, from unboxing to enjoying your new sun shelter. We’ll cover everything you need to know to get your Neso tent up and stable, even in breezy conditions.
Let’s dive in and make sure you’re an expert Neso tent setter-upper in no time!
Key Takeaways
- Unpack and Inspect: Begin by carefully unpacking your Neso tent and checking that all components (tent fabric, poles, sandbags, stakes, and bag) are present and in good condition before setting up.
- Find the Right Spot: Choose a flat, level area with good visibility of the water or your desired activity area. Avoid areas with sharp objects or potential hazards.
- Anchor with Sandbags or Stakes: The primary method for securing your Neso tent is using the provided sandbags, which should be filled with ample sand and placed under the corner loops. For firmer ground, stakes can also be used.
- Pole Assembly and Placement: Assemble the telescopic poles and insert them into the reinforced pockets or grommets at the corners of the tent. The poles will angle outwards to create the tent’s structure.
- Adjust for Tension: Once the poles are in place, adjust their height and angle to create optimal tension in the fabric, ensuring a taut and stable shelter.
- Troubleshooting Common Issues: Be prepared for wind by ensuring sandbags are heavy and stakes are secure. If the fabric sags, readjust pole height or sandbag placement.
Unpacking Your Neso Tent
The very first step is to get everything out of the bag and make sure you have all the necessary components. This ensures you’re not caught off guard halfway through the setup process realizing something is missing.
What’s Inside the Bag?
When you open your Neso tent bag, you should find the following items:
- The Neso tent fabric
- Telescopic aluminum poles (usually 2 or more, depending on the tent size)
- Sandbags (typically 4, one for each corner)
- Tent stakes (usually 4, for extra security)
- A carrying bag for everything
Initial Inspection
Before you head out, take a moment to inspect each part.
- Tent Fabric: Unfold the fabric and check for any rips, tears, or loose stitching. Make sure the reinforced corners and pole pockets are intact.
- Poles: Extend and collapse the telescopic poles to ensure they move smoothly and lock securely.
- Sandbags: Check that the sandbags are sturdy and the seams are well-stitched.
- Stakes: Ensure the stakes are not bent and are of good quality.
Having everything in order will save you time and frustration when you’re at your chosen spot.
Choosing the Perfect Location
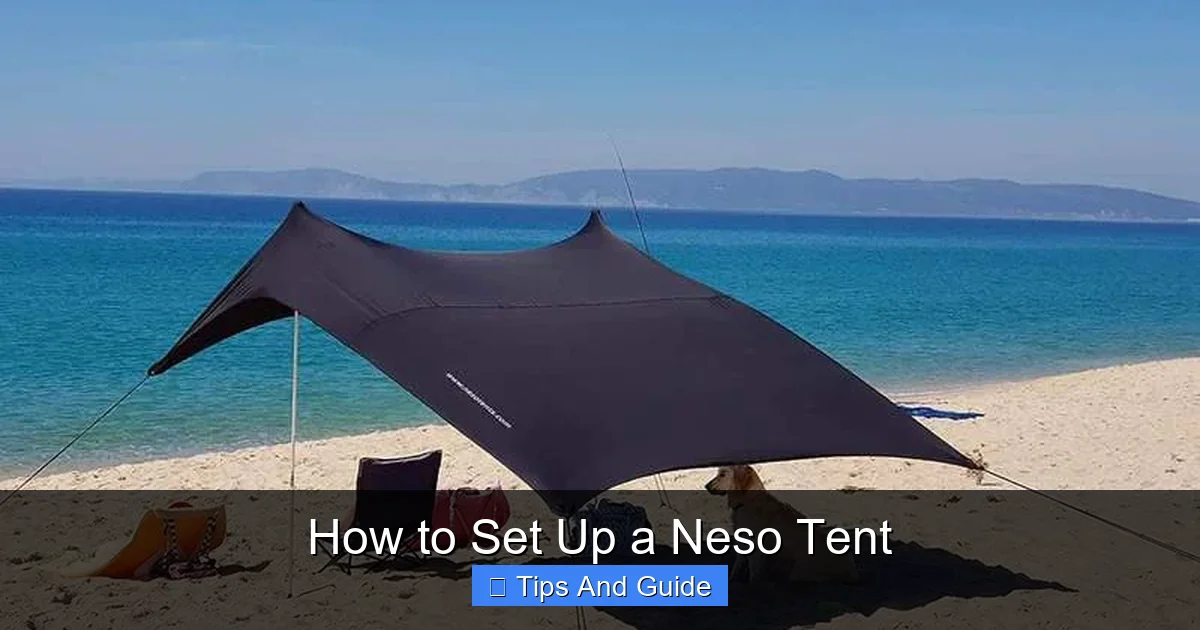
Visual guide about How to Set Up a Neso Tent
Image source: global-uploads.webflow.com
Where you set up your Neso tent can make a big difference in how much you enjoy your day and how well the tent stays put.
Key Location Considerations
- Flat and Level Ground: This is crucial for stability. A sloped surface can cause the tent to lean, making it less effective and more prone to wind damage.
- Proximity to Water or Activities: If you’re at the beach, consider being close enough to the water for easy access but far enough to avoid incoming waves. If at a park or event, choose a spot that’s convenient for your group.
- Wind Direction: While Neso tents are designed to handle some wind, positioning them strategically can help. Try to orient the tent so the opening faces away from the prevailing wind.
- Avoid Obstacles: Look out for sharp rocks, branches, or other debris that could damage the tent fabric or make the ground uncomfortable.
- Sun’s Path: Think about where the sun will be throughout the day. You might want to position the tent to maximize shade during the hottest parts of the day.
Step-by-Step Neso Tent Setup
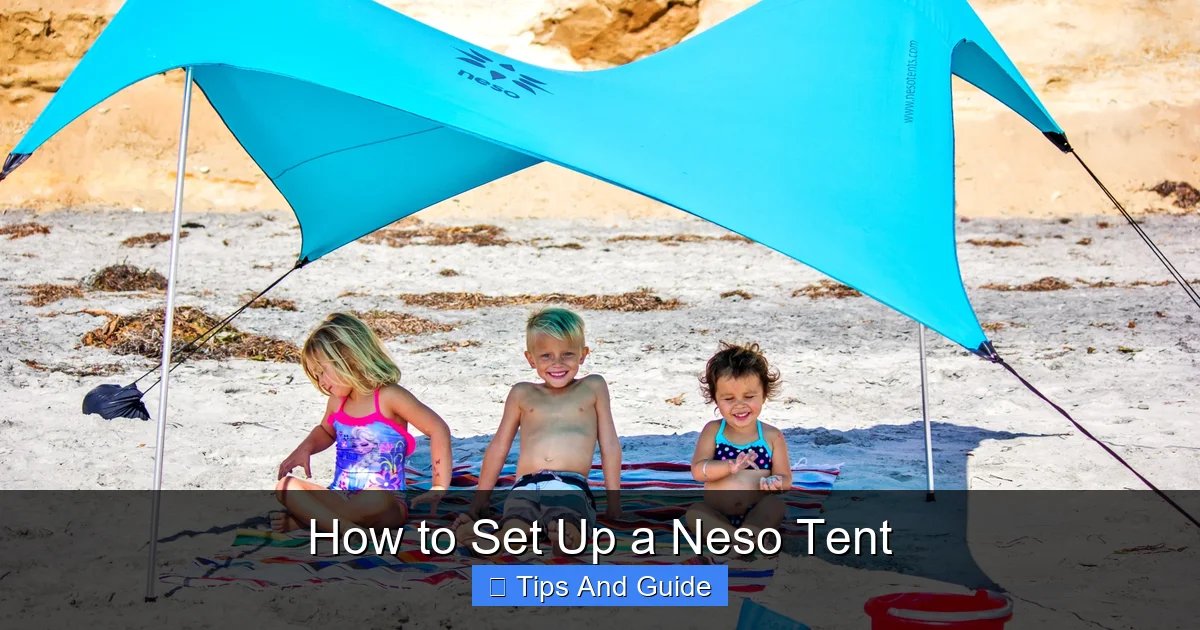
Visual guide about How to Set Up a Neso Tent
Image source: neso.com
Now, let’s get down to the actual setup. This process is designed to be straightforward and can be done by one person, though a second person can speed things up.
Step 1: Lay Out the Tent Fabric
Start by unfolding the Neso tent fabric and laying it flat on the ground in your chosen location. Spread it out so that all four corners are visible and accessible.
Step 2: Prepare the Sandbags
The sandbags are your primary anchors, especially on sandy surfaces.
Filling the Sandbags
- Locate the openings of the sandbags.
- Fill each sandbag with as much sand as you can manage. The heavier the sandbags, the more secure your tent will be.
- Close the sandbags securely. Some have a drawstring, while others have a velcro closure.
Step 3: Position the Sandbags
This is where the tent starts taking shape.
Corner Anchoring
- Place one filled sandbag under each of the four corner loops of the Neso tent fabric.
- Ensure the sandbag is positioned so that the corner loop of the tent fabric is directly on top of it. This will be where the tent pole eventually connects.
Step 4: Assemble and Insert the Tent Poles
Neso tents use telescopic poles that extend and lock into place.
Pole Assembly
- Take the telescopic poles and extend them to their full length.
- Most poles have a twist-lock or push-button mechanism to secure them at the desired length. Ensure they are locked firmly.
Pole Insertion
- Now, take one assembled pole. You will insert one end of the pole into the reinforced grommet or pocket located at the corner of the tent where the sandbag is placed.
- The other end of the pole will then lean upwards and outwards, creating the support for the tent.
- Repeat this for all poles, inserting them into their respective corner anchors.
Step 5: Create the Tension and Structure
This is the key step to getting your Neso tent standing upright and providing shade.
Angling the Poles
- As you insert the poles, they will naturally want to push the tent fabric upwards.
- The goal is to angle the poles outwards from the corner sandbags. The fabric of the tent will stretch over the poles.
- You want to create a balanced tension. If the fabric looks saggy, you might need to adjust the angle or height of the poles.
Adjusting for Optimal Shade
- Play with the pole angles and heights slightly to achieve the best shade coverage and tautness of the fabric. The Neso tent is designed to create a large, open shaded area.
- You might need to push the sandbags slightly further out or adjust the pole angle to achieve the desired shape.
Step 6: Secure with Stakes (Optional but Recommended)
While sandbags are the primary anchors, using the provided stakes adds an extra layer of security, especially in windy conditions.
Stake Placement
- If your Neso tent came with stakes, use them to further anchor the corners or any other designated points on the tent fabric.
- Drive the stakes firmly into the ground, ideally at an angle away from the tent for maximum holding power.
- Connect the stakes to the tent using the loops or guy lines provided.
Tips for a Stable Neso Tent
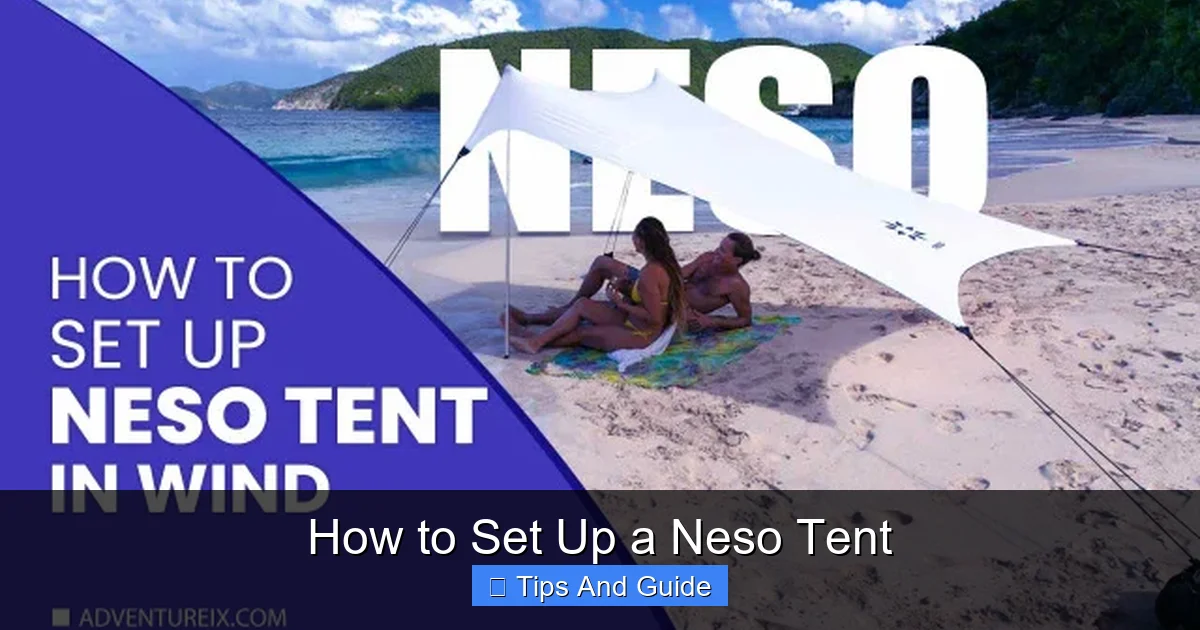
Visual guide about How to Set Up a Neso Tent
Image source: 64.media.tumblr.com
Neso tents are generally stable, but a few extra tricks can make them even more resilient.
Maximize Your Sandbag Weight
The heavier your sandbags, the better they will grip the ground. Don’t be shy about filling them completely. If you’re on a particularly windy beach, consider bringing extra weight, like large rocks if available, to place on top of the sandbags.
Consider the Wind Direction
As mentioned earlier, positioning the tent correctly is key. If you anticipate wind, try to have the open side of the tent facing away from the wind. This prevents the wind from catching the fabric and lifting the tent. Some users find that slightly angling the poles more forward (towards the opening) can help deflect wind.
Reinforce with Stakes
Even if you’re on sand, driving the stakes in at an angle can provide significant support. If the sand is very soft, you might want to use larger beach stakes or bury the stakes deeper. For grassy areas, stakes are essential for a secure setup. You can find more tips on choosing the right setup in our guide to the best pop-up tent for the beach.
Proper Pole Tension
The fabric should be taut. If you notice sagging, it means the tension isn’t quite right. Adjust the pole height or reposition the sandbags to pull the fabric tighter.
Troubleshooting Common Neso Tent Issues
Even with the best instructions, you might encounter a few hiccups. Here’s how to address them.
The Tent Feels Loose
- Problem: The fabric is saggy, and the tent doesn’t feel taut.
- Solution:
- Check that your poles are fully extended and locked.
- Ensure the sandbags are filled with plenty of sand.
- Try adjusting the angle of the poles to create more tension. You might need to push the sandbags further out.
- If using stakes, make sure they are driven in securely.
The Tent is Wobbling in the Wind
- Problem: The tent is unstable and shaking in the wind.
- Solution:
- This is the most common issue. The first line of defense is heavier sandbags. Make them as heavy as possible.
- Ensure the sandbags are placed directly under the corner loops.
- Use all the provided stakes to anchor the tent securely. If the ground is soft, try to bury the stakes deeper or use them at a steeper angle.
- Try to reposition the tent so that the main opening is facing away from the wind.
- If the wind is severe, it might be necessary to take the tent down temporarily. Some tents, like those reviewed for best pop-up tent for wind, have specific design features to combat strong gusts.
Difficulty Inserting Poles
- Problem: The poles are hard to insert into the grommets or pockets.
- Solution:
- Ensure the poles are fully extended and straight.
- Check that the grommets or pockets are clear of any debris.
- Sometimes, the fabric around the grommet can be a bit stiff. Gently work the pole into place.
- If it’s a new tent, the fabric might be a bit tight. This usually loosens up with use.
Taking Down Your Neso Tent
Packing up is just as important as setting up. A neat pack-up makes future setups easier.
Step 1: Remove Stakes and Poles
Carefully remove any stakes from the ground. Then, carefully collapse the telescopic poles by releasing their locking mechanisms and shortening them.
Step 2: Empty and Fold Sandbags
Empty the sand from the sandbags. Shake out any excess sand. Fold them neatly to fit back into the carrying bag.
Step 3: Fold the Tent Fabric
This can be a bit of a puzzle, but here’s a common method:
- Start by folding the tent in half lengthwise, then in half again.
- Then, fold it widthwise until it’s a manageable size to roll or fold into the carrying bag.
- Aim for a compact bundle.
Step 4: Pack Everything
Place the folded tent fabric, collapsed poles, and sandbags into the original carrying bag. Ensure everything fits snugly.
Conclusion
Setting up your Neso tent is a simple process that can be mastered in just a few minutes once you know the steps. By following this comprehensive guide, you’ll be able to erect your Neso tent quickly and efficiently, ensuring you and your companions have ample shade to enjoy your outdoor adventures. Remember to choose a good location, anchor it securely with sandbags and stakes, and adjust the poles for optimal tension. With a little practice, you’ll be a Neso tent pro, ready to create your personal oasis of shade wherever you go. Enjoy your sunny days!