
This guide provides a comprehensive walkthrough on how to repair your tent trailer canvas, saving you money and extending its life. You’ll learn to identify damage, gather the right materials, and execute effective repairs for rips, tears, and seam separations. Follow these steps to keep your tent trailer in top condition for many adventures to come.
How to Repair a Tent Trailer Canvas
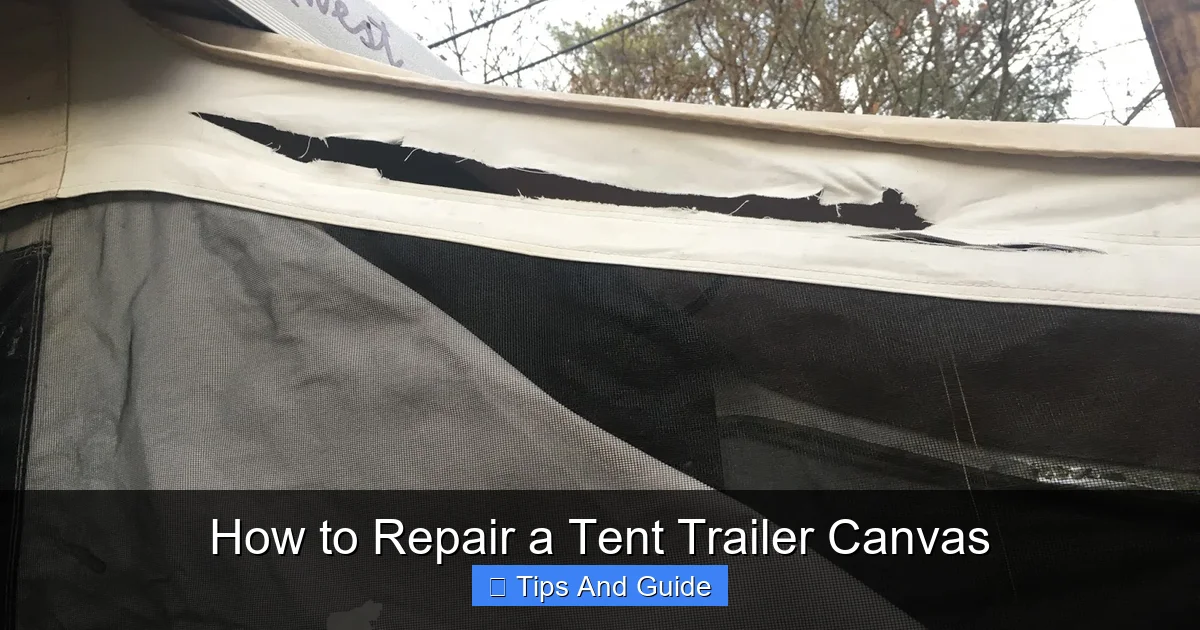
Your tent trailer is your ticket to adventure, offering the comforts of home in the great outdoors. But like any piece of gear, its canvas can suffer wear and tear. Rips, tears, and seam separations can happen, often at the most inconvenient times. Don’t let minor damage put a damper on your camping trips! Learning how to repair your tent trailer canvas is a valuable skill that can save you money and significantly extend the life of your beloved camper. This guide will walk you through everything you need to know, from assessing the damage to making lasting repairs.
We’ll cover common types of canvas damage and provide step-by-step instructions for fixing them. You’ll learn about the best materials to use, essential tools, and important tips for ensuring your repairs are both functional and discreet. Whether you’re dealing with a small puncture or a larger tear, this guide will empower you to tackle the job with confidence. Get ready to get your tent trailer back in prime condition!
Key Takeaways
- Assess the Damage Accurately: Before starting any repair, thoroughly inspect the canvas to understand the extent and type of damage. This includes looking for rips, tears, seam separations, and holes, as well as checking the overall condition of the canvas.
- Gather the Right Supplies: Having the correct tools and materials is crucial for a successful repair. This typically includes canvas repair tape, patch kits, strong fabric glue, a sewing kit with heavy-duty needles and thread, and cleaning supplies.
- Clean the Area Thoroughly: A clean surface is essential for any adhesive or patch to bond properly. Ensure the damaged area and its surroundings are free from dirt, mildew, and moisture before beginning repairs.
- Repairing Rips and Tears: For small rips, canvas repair tape or a patch kit with adhesive backing can be effective. Larger tears may require sewing a patch from matching canvas or using a combination of glue and stitching for maximum durability.
- Mending Seam Separations: If seams have come undone, you’ll likely need to re-stitch them. Using a heavy-duty needle and strong, waterproof thread, carefully replicate the original stitch pattern to ensure a watertight seal.
- Waterproofing and Protection: After repairs, consider applying a canvas sealant or waterproofing spray to the repaired areas and the entire canvas to protect it from the elements and prevent future damage.
Understanding Tent Trailer Canvas and Common Damages
Tent trailer canvas is typically made from durable, water-resistant materials like treated cotton canvas or synthetic fabrics. Over time and with exposure to the elements, this material can become weaker, leading to various types of damage. Understanding these common issues is the first step in effective repair.
Types of Canvas Damage:
- Rips and Tears: These are perhaps the most common issues. They can occur from sharp objects, excessive force, or general wear.
- Holes and Punctures: Similar to tears, these are openings in the fabric, often caused by branches, rocks, or even insects.
- Seam Separations: The stitching holding different canvas panels together can weaken, fray, or break, creating gaps.
- Mildew and Mold: If canvas is stored wet or in humid conditions, mildew and mold can grow, weakening the fabric and causing unsightly stains.
- UV Degradation: Prolonged exposure to sunlight can break down the fabric fibers, making the canvas brittle and prone to tearing.
Addressing these issues promptly will prevent them from worsening and causing more significant problems.
Gathering Your Repair Supplies
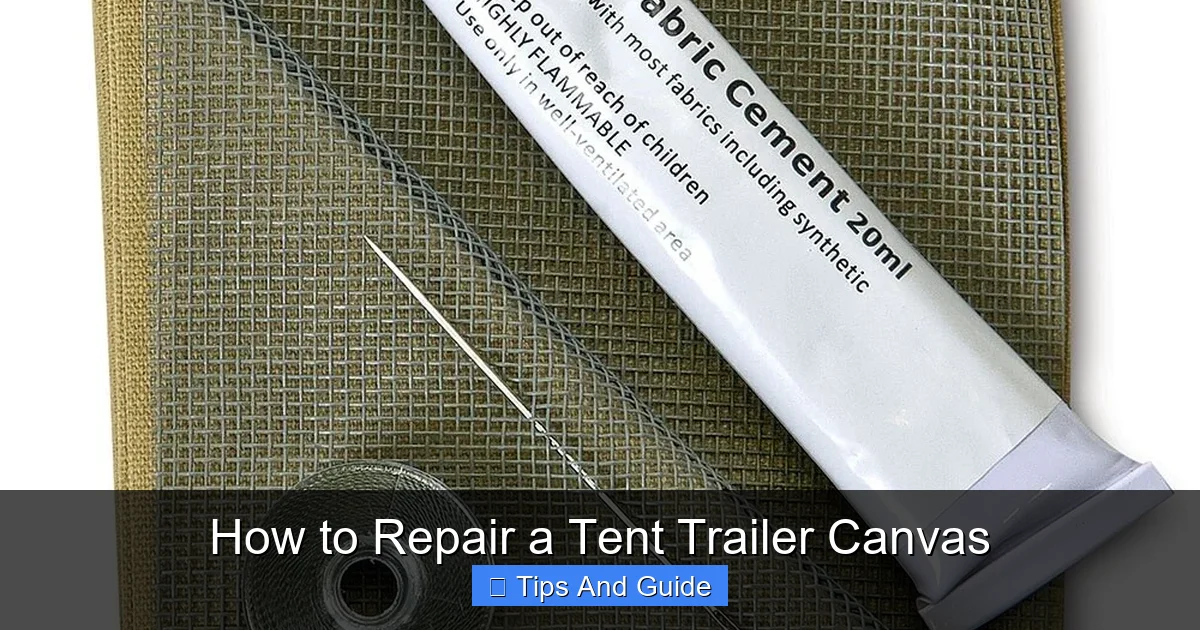
Having the right tools and materials on hand is crucial for a successful tent trailer canvas repair. Don’t skimp on quality; using the right products will ensure your repairs are durable and effective. Here’s a list of essential items:
Visual guide about How to Repair a Tent Trailer Canvas
Image source: blogger.googleusercontent.com
Essential Tools and Materials:
- Canvas Repair Tape: Look for strong, waterproof, and UV-resistant tape specifically designed for outdoor fabrics. Brands like Tenacious Tape are popular.
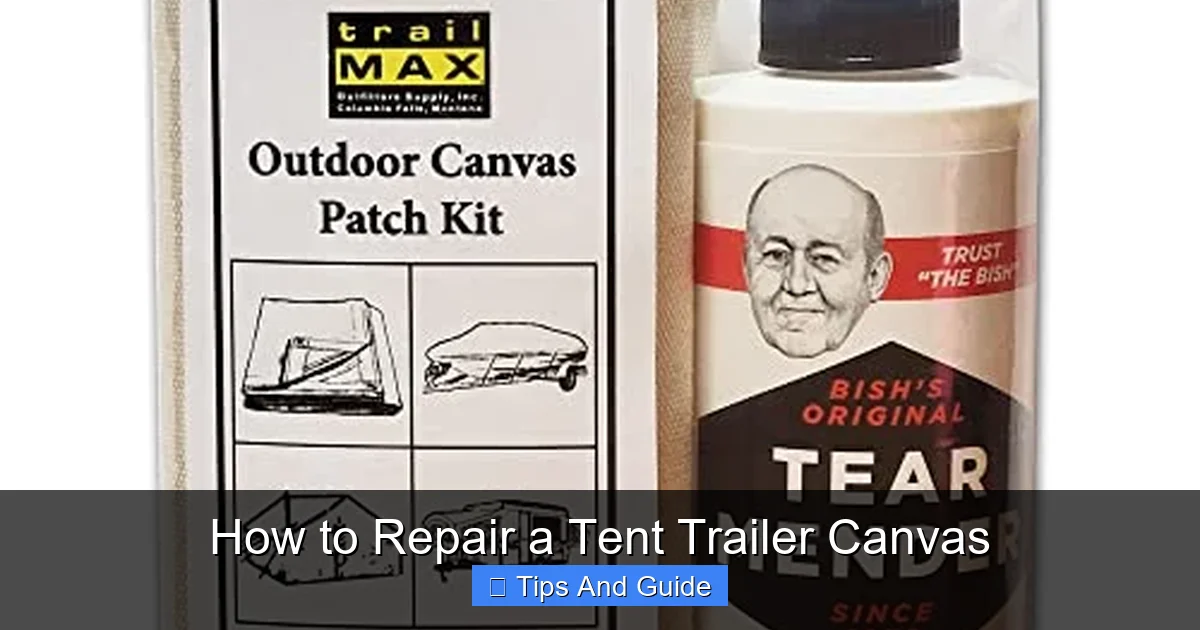
- Canvas Patch Kit: These often come with pre-cut patches of canvas material and strong adhesive.
- Heavy-Duty Fabric Glue or Adhesive: A waterproof and flexible fabric glue is essential for bonding seams and patching. Products like Gear Aid Seam Grip or similar flexible, waterproof adhesives work well.
- Sewing Kit: You’ll need a sturdy needle (preferably a curved one for canvas) and strong, waxed polyester thread. Waxed thread is more resistant to rot and water.
- Cleaning Supplies: Mild soap, water, a soft brush or sponge, and clean cloths are needed to prepare the canvas.
- Rubbing Alcohol: Useful for cleaning the area before applying adhesive tape.
- Scissors or a Craft Knife: For cutting patches and tape cleanly.
- Masking Tape or Painter’s Tape: To hold patches in place while glue dries or to create a clean edge for taping.
- Optional: Canvas Sealant or Waterproofing Spray: To re-treat the repaired area and boost overall water resistance.
- Optional: Matching Canvas Scraps: If you need to create a custom patch for a larger tear.
Having a well-stocked repair kit means you’re prepared for most common canvas issues.
Step-by-Step Guide to Repairing Tent Trailer Canvas
Now, let’s get down to business. We’ll break down the repair process into manageable steps, covering different types of damage.
Visual guide about How to Repair a Tent Trailer Canvas
Image source: d2j6dbq0eux0bg.cloudfront.net
Step 1: Assess and Clean the Damaged Area
Before you can fix anything, you need a clear understanding of the problem and a clean workspace.
Visual guide about How to Repair a Tent Trailer Canvas
Image source: m.media-amazon.com
H3: Inspect the Damage
Carefully examine the rip, tear, or seam separation. Note its size, location, and how deep it goes. Also, check the surrounding canvas for any signs of weakness, mold, or mildew.
H3: Clean the Canvas
This is a critical step that many people overlook. Dirt, grime, mildew, or moisture will prevent adhesives and tapes from sticking properly.
- Gently scrub the damaged area and a few inches around it with mild soap and water. Use a soft brush to avoid damaging the fabric further.
- Rinse thoroughly with clean water to remove all soap residue.
- Allow the canvas to dry completely. This might take several hours or even a day, depending on the weather. Ensure it’s bone dry before proceeding.
- If there are any stubborn mildew stains, you can use a diluted bleach solution (1 part bleach to 10 parts water) or a specialized canvas cleaner. Always test this on an inconspicuous area first to ensure it doesn’t discolor the fabric. Rinse extremely well after using bleach.
Step 2: Repairing Rips and Tears
This section covers how to fix openings in the canvas.
H3: For Small Rips and Punctures (Using Repair Tape)
This is the quickest and easiest method for minor damage.
- Cut the Tape: Cut a piece of canvas repair tape that is at least 1 inch larger than the rip or puncture on all sides. Rounding the corners of the tape can help prevent it from peeling up later.
- Prepare the Surface: Ensure the area is perfectly clean and dry. You can wipe the area with rubbing alcohol and let it dry to remove any remaining oils or residue.
- Apply the Tape: Carefully peel off the backing from one side of the tape. Align it precisely over the rip, ensuring it covers the entire damaged area. Press down firmly, working from the center outwards to eliminate any air bubbles.
- Apply the Second Side (if applicable): If your tape has a second backing, peel it off and press the tape down securely.
- Smooth and Seal: Apply firm pressure to the tape for at least 30 seconds. You can use a smooth, hard object like a credit card to help press it into place.
Tip: For extra security, especially on high-stress areas, you can apply tape to both the inside and outside of the canvas.
H3: For Larger Tears (Using a Patch Kit or Custom Patch)
Larger tears require a more robust solution, typically involving a patch.
- Prepare the Patch: If using a pre-made patch kit, select a patch that is significantly larger than the tear. If you’re creating your own patch, cut a piece of matching or similar durable canvas material. It should extend at least 2 inches beyond the tear on all sides.
- Position the Patch: Place the patch over the tear, ensuring it completely covers the damaged area.
- Option A: Adhesive Patch: If your patch kit has an adhesive backing, peel off the backing and carefully place the patch over the tear. Press down firmly, working from the center outwards to eliminate wrinkles and air bubbles.
- Option B: Glue and Sew: For maximum durability, especially on high-stress areas, it’s best to sew the patch in place after applying adhesive.
- Apply a thin, even layer of heavy-duty fabric glue to the edges of the tear and the underside of the patch.
- Carefully position the patch over the tear and press down firmly.
- Use masking tape to hold the patch securely in place while the glue dries. Follow the glue manufacturer’s instructions for drying time.
- Sewing the Patch: Once the glue is dry (or if you’re only using glue and plan to sew later), it’s time to stitch.
- Thread your heavy-duty needle with the waxed polyester thread. Tie a strong knot at the end.
- Start stitching around the perimeter of the patch, about half an inch in from the edge. Use a strong stitch, like a whipstitch or a backstitch, that will hold securely.
- Aim to make your stitches close together for a stronger, more watertight seal.
- Continue stitching around the entire patch. When you reach the end, tie off your stitches securely.
- If the tear is long and thin, you can also carefully stitch along the tear line itself before or after applying the patch, reinforcing the original seam.
Example: Imagine a 6-inch tear along a stress point. You’d cut a patch at least 10×10 inches. You’d glue it down, let it dry, and then sew a continuous line of stitches all around its outer edge, and possibly along the original tear line as well.
Step 3: Mending Seam Separations
Loose or broken seams are common points of failure.
H3: Re-stitching Separated Seams
- Clean the Area: Ensure the seam and the fabric around it are clean and dry.
- Align the Seam: Carefully align the two pieces of canvas that have separated.
- Thread Your Needle: Use your strong, waxed thread and a sturdy needle.
- Start Stitching: Begin stitching from one end of the separation. It’s ideal to replicate the original stitch pattern if you can identify it. A strong, overlapping stitch is best.
- Use a Strong Stitch: A whipstitch or a backstitch works well here. If you can, try to pass the needle through the same holes the original stitching used, or very close to them.
- Apply Fabric Glue (Optional but Recommended): As you stitch, or after you’ve stitched the seam, you can apply a thin bead of fabric glue along the seam for added waterproofing and strength.
- Reinforce: If the seam is in a high-stress area, consider adding a second line of stitching or applying a strip of canvas repair tape over the repaired seam for extra durability.
Tip: If the original seam allowance has frayed away, you might need to create a new seam slightly further in on the fabric, or even add a small strip of canvas to bridge the gap before re-stitching.
Step 4: Dealing with Mildew and Mold
Mildew not only looks bad but can degrade the fabric.
H3: Cleaning and Preventing Mildew
- Thorough Cleaning: As mentioned in Step 1, clean affected areas with a diluted bleach solution or a specialized canvas cleaner. Ensure you rinse very thoroughly.
- Sunlight and Air: Once clean and dry, expose the canvas to direct sunlight for a few hours. Sunlight is a natural disinfectant and helps kill any remaining spores. Ensure good ventilation.
- Waterproofing: After treating mildew, it’s highly recommended to reapply a canvas sealant or waterproofing spray. This helps protect the fabric and makes it less hospitable to mildew growth.
Prevention is Key: Always ensure your tent trailer canvas is completely dry before folding and storing it. If you camp in damp conditions, open it up to air out as soon as you get home.
Step 5: Waterproofing and Protection
After any repair, especially on seams, it’s a good idea to boost the canvas’s water resistance.
H3: Applying Sealants and Sprays
- Choose the Right Product: Select a waterproofing spray or sealant specifically designed for canvas or outdoor fabrics. Look for UV protection as well.
- Apply Evenly: Ensure the canvas is clean and dry. Apply the sealant or spray in a well-ventilated area, following the product’s instructions. Work in thin, even coats.
- Cover Repaired Areas: Make sure to thoroughly coat any repaired sections, as well as the entire canvas, for consistent protection.
- Allow to Cure: Let the sealant or spray cure completely according to the product instructions before folding or using the tent trailer.
Regularly reapplying waterproofing will keep your canvas in excellent condition and prevent leaks.
Troubleshooting Common Repair Issues
Sometimes, repairs don’t go as smoothly as planned. Here are a few common issues and how to address them.
Issue: Adhesive Tape Peeling Up
Solution: This usually happens if the surface wasn’t clean, or if there’s too much stress on the tape. Clean the area thoroughly again, remove the old tape if possible without damaging the canvas, and reapply a fresh piece of tape, ensuring you press very firmly. For high-stress areas, consider adding stitches around the edge of the tape.
Issue: Needle Breaking or Bending
Solution: Tent trailer canvas can be thick. Ensure you are using a heavy-duty, strong needle designed for canvas or upholstery. If you’re still having trouble, try using a thicker thread which might require a slightly larger needle. A thimble can also help you apply more force.
Issue: Thread Snapping
Solution: You need a strong, durable thread. Waxed polyester thread is recommended as it’s resistant to rot and moisture and has good tensile strength. Make sure your stitches are not too large, as this can put undue stress on the thread.
Issue: Glue Not Holding
Solution: Ensure you used the correct type of fabric glue and that the surface was completely clean and dry. Follow the drying times precisely. If the bond is weak, you may need to reapply the glue and consider reinforcing the repair with stitches.
Conclusion
Repairing your tent trailer canvas is a rewarding DIY project that can save you considerable expense and keep your camper in top shape. By following these steps – from thorough cleaning and careful inspection to using the right materials and techniques for tears, rips, and seams – you can achieve professional-looking, durable repairs. Remember that preventative care, like ensuring your canvas is always dry and protected with waterproofing, is the best way to avoid major damage in the first place. With a little effort and the right approach, your tent trailer canvas will be ready for many more adventures under the open sky. Happy camping!