A snapped tent pole can ruin a camping trip, but it doesn’t have to. This guide provides comprehensive instructions on how to repair a broken tent pole using common household items or a repair kit. You’ll learn how to assess the damage, choose the right repair method, and ensure your tent is sturdy and ready for your next adventure. Don’t let a snapped pole cut your trip short!
Going camping is a fantastic way to connect with nature, unwind, and create lasting memories. But what happens when your trusty tent’s support system fails? A snapped tent pole can feel like a campsite catastrophe, leaving your shelter vulnerable to the elements and potentially cutting your adventure short. The good news is that you don’t need to be a wilderness survival expert to fix a snapped tent pole. With a few common items or a simple repair kit, you can mend your pole and get back to enjoying the great outdoors. This guide will walk you through everything you need to know to confidently repair your tent poles, ensuring your tent remains a safe and comfortable haven.
## Understanding Tent Pole Materials
Before you can fix a snapped tent pole, it’s helpful to know what it’s made of. Most modern tents use poles constructed from one of three materials:
* Fiberglass: This is the most common and affordable material. Fiberglass poles are strong but can splinter if broken. They are often found in smaller to medium-sized tents.
* Aluminum: Lighter and stronger than fiberglass, aluminum poles are common in backpacking tents and higher-end camping tents. They are generally more durable but can bend or break under extreme stress.
* Carbon Fiber: The lightest and strongest option, carbon fiber poles are typically found in premium, lightweight tents. They are very resilient but can be more expensive to replace.
The repair method will vary slightly depending on the material, especially concerning how you handle the broken edges.
## Step 1: Assess the Damage
The first and most crucial step is to carefully inspect the snapped tent pole. This will help you determine the best repair strategy.
### H3: Identify the Location of the Break
Is the pole broken completely in half, or is it a crack or a splinter? A clean break is usually easier to fix than a jagged or splintered one.
### H3: Check the Elastic Cord
Most tent poles have an internal elastic cord that keeps the sections together. If the break is severe, the cord might also be damaged or stretched. You’ll need to ensure the cord is still intact and has enough tension for the repair.
### H3: Examine the Pole Sections
Are the pole sections still round, or have they become misshapen? If the pole is severely bent or crushed, it might be beyond simple repair.
## Step 2: Gather Your Repair Materials
The materials you need will depend on the type of break and what you have available. Here are some common options:
### H3: Tent Pole Repair Kit
These kits are specifically designed for tent poles and are widely available online or at outdoor gear stores. They typically include:
* Repair Sleeves: These are usually short, hollow tubes made of metal or plastic that slide over the break.
* Replacement Cord: If your elastic cord is damaged.
* End Caps: To secure the cord.
H3: Improvised Materials
If you’re out camping and don’t have a repair kit, you can often use common items:
* Duct Tape: The ultimate camping fix-all. It’s strong and versatile.
* Strong Adhesive Tape: Such as gaffer tape or sports tape.
* Smaller Diameter Pole/Rod: A sturdy twig, a metal dowel, or even another section of a tent pole if you have a spare.
* Epoxy or Strong Glue: A fast-setting epoxy can be very effective for clean breaks.
* Sandpaper: To smooth edges.
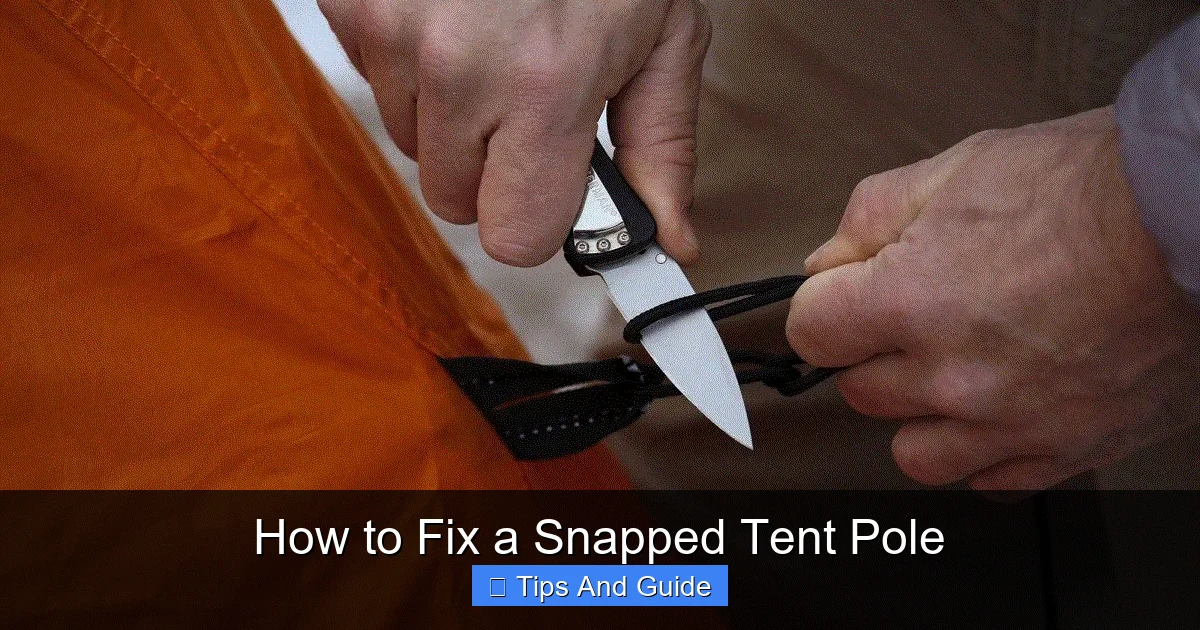
* Cutting Tool: A knife, multi-tool, or small saw for trimming.
* Scissors: For cutting tape.
Key Takeaways
- Assess the Damage: Before starting any repair, carefully examine the snapped tent pole to determine the extent of the break and identify if the pole is made of fiberglass, aluminum, or carbon fiber.
- Gather Your Materials: Collect the necessary tools and materials, which may include a repair sleeve, duct tape, epoxy, sandpaper, and a cutting tool, depending on the chosen repair method.
- Prepare the Pole: Clean and smooth the broken ends of the pole to ensure a strong and secure bond for the repair.
- Choose the Right Repair Method: Select the most appropriate repair technique based on the type of break and available materials, such as using a sleeve for clean breaks or a splint for more complex damage.
- Execute the Repair: Follow the step-by-step instructions carefully for your chosen method, ensuring the repair is strong, stable, and allows the pole to flex appropriately.
- Test and Reinforce: Once the repair is complete and cured, test the pole’s integrity by gently flexing it. Add extra reinforcement with tape if needed.
Step 3: Prepare the Broken Pole
Proper preparation is key to a lasting repair.
H3: Clean the Pole
Wipe away any dirt, mud, or debris from the broken sections. This ensures good adhesion for tape or glue.
H3: Smooth Rough Edges
If the break is jagged or splintered, gently use sandpaper or a knife to smooth down any sharp or protruding pieces. This is especially important for fiberglass poles to prevent further splintering and for safety. For aluminum poles, you want to ensure the edges are as clean as possible for a sleeve to slide over them.
H3: Trim Damaged Cord (If Necessary)
If the internal elastic cord is frayed or significantly damaged at the break point, you may need to trim it slightly to allow for a clean repair. Be careful not to cut it too short, as you need enough length to rejoin the sections.
Step 4: Choose and Execute Your Repair Method
There are several ways to fix a snapped tent pole, depending on the damage and your available materials.
Method 1: Using a Tent Pole Repair Sleeve (Ideal for Clean Breaks)
This is the most common and effective method when you have a dedicated repair sleeve.
H3: Slide the Sleeve Over the Break
* If the pole snapped completely in two with clean ends, slide the repair sleeve over one of the broken ends.
* If both ends are exposed, apply the sleeve so it bridges the gap, covering an equal portion of each broken section.
H3: Secure the Sleeve with Tape
* Wrap duct tape or another strong adhesive tape tightly around the repair sleeve and extending a few inches onto the pole on either side of the sleeve.
* Overlap the tape as you wrap to create a robust and secure bond. Ensure the tape is smooth and tight, with no wrinkles or loose edges.
H3: Re-tension the Elastic Cord (If Needed)
* If the break was severe enough to affect the elastic cord, you might need to temporarily thread the cord through the sleeve and the rejoined pole sections. You can use a needle and thread or a thin piece of wire to guide the cord.
Method 2: Improvised Splint with Duct Tape (For Jagged or Partial Breaks)
This method is great when you don’t have a sleeve but have plenty of duct tape.
H3: Position the Pole Sections
* Align the broken sections of the tent pole as closely as possible to their original shape. If one section is significantly damaged, you might need to insert a smaller rod or twig as a splint on the inside or outside.
H3: Wrap with Tape
* Begin wrapping duct tape firmly around the entire break area. Start a few inches below the break and extend several inches above it.
* Overlap the tape generously, creating multiple layers for strength.
* Ensure the tape is wrapped tightly and smoothly, pressing it down as you go to maximize adhesion.
* If using an internal splint (like a twig), wrap the tape around the outside to hold the splint and the pole sections together. For an external splint, wrap the tape around both the pole and the splint.
Method 3: Using Epoxy for Clean Breaks (Most Permanent for Certain Breaks)
Epoxy can create a very strong bond, but it requires some drying time and is less forgiving if you make a mistake.
H3: Prepare the Epoxy
* Follow the instructions on your epoxy packaging to mix the two parts thoroughly. Work in a well-ventilated area.
H3: Apply Epoxy to the Break
* Apply a generous amount of mixed epoxy to the broken ends of the pole.
* Carefully align the two sections of the pole and press them together firmly.
* Wipe away any excess epoxy that squeezes out.
H3: Reinforce with Tape (Optional but Recommended)
* While the epoxy is still wet or once it has begun to set slightly, you can wrap duct tape tightly around the joint to provide immediate support and further strengthen the bond once the epoxy fully cures.
H3: Allow to Cure
* Let the epoxy cure completely according to the manufacturer’s instructions. This usually takes several hours, or even up to 24 hours for maximum strength. Avoid putting any stress on the pole during this time.
Method 4: Using a Repair Sleeve as a Splint (Combines Methods 1 & 2)
If you have a repair sleeve but the break is a bit more complex or jagged, you can combine methods.
H3: Slide the Sleeve Over the Break
* Position the repair sleeve over the damaged area, ensuring it covers as much of the break as possible and bridges the gap between pole sections.
H3: Wrap with Tape
* Wrap the sleeve securely with duct tape, just as you would in Method 1. This reinforces the sleeve and adds extra stability to the repair.
Step 5: Test and Reinforce
Once your repair is complete, it’s time to check its integrity.
H3: Gently Flex the Pole
* Carefully bend the repaired section of the pole to see if it holds its shape and feels sturdy. Don’t force it too much initially.
* If it feels loose or wobbly, add more layers of tape for reinforcement.
H3: Reassemble the Tent
* Once you’re confident in the repair, reassemble your tent.
* Pay attention to how the repaired pole section performs under the tension of the tent fabric.
Troubleshooting Common Issues
Visual guide about How to Fix a Snapped Tent Pole
Image source: cdn.shopify.com
* Pole is too short after repair: This can happen if you had to trim the pole or if the elastic cord is too slack. You might need to tie a knot in the elastic cord to regain tension or use a slightly longer repair sleeve if available.
* Repair feels weak: Add more layers of duct tape, ensuring each layer is applied tightly and smoothly. For epoxy repairs, you may need to reapply if the bond fails.
* Fiberglass splinters are sharp: Always wear gloves when handling broken fiberglass. Use fine-grit sandpaper to smooth these down as much as possible before repairing. A good tape wrap will also cover any remaining sharp edges.
* Aluminum pole is bent: If the bend is minor, you might be able to gently bend it back into shape before repairing. Severe bends are often difficult to fix effectively.
Preventing Future Tent Pole Breakage
While repairs are often necessary, a little preventative care can go a long way.
* Proper Storage: Always store your tent poles clean and dry in their original bag. Avoid storing them under heavy objects that could cause them to bend or break.
* Careful Setup and Takedown: Avoid forcing poles into place or yanking them apart. Be gentle during the assembly and disassembly process.
* Know Your Limits: Don’t pitch your tent in excessively high winds or extreme weather conditions unless it’s designed for such use. Understanding how to pitch a tent properly in windy conditions can make a significant difference. If you’re looking for a tent that can handle the elements, consider options like the best pop-up tent for wind.
* Regular Inspection: Before each trip, inspect your poles for any signs of wear or damage. Catching small issues early can prevent major breaks.
Conclusion
A snapped tent pole doesn’t have to signal the end of your camping trip or your tent’s usefulness. With this guide, you have the knowledge and techniques to perform a reliable repair. Whether you have a dedicated repair kit or are relying on good old duct tape, you can restore the integrity of your tent’s structure. Being prepared with a repair kit or even just a roll of strong tape can be a lifesaver on the trail, allowing you to continue enjoying your outdoor adventures without interruption. Remember, a well-maintained tent is a happy tent, and a little effort in fixing a snapped pole can save you money and extend the life of your camping gear for many trips to come. Happy camping!