
Cleaning your canvas tent is essential for its longevity and performance. This guide provides a comprehensive walkthrough of how to effectively clean, dry, and store your canvas tent. By following these simple steps, you can ensure your tent remains waterproof, mildew-free, and ready for your next adventure. Proper care extends the life of your tent, so let’s dive in!
Welcome to your ultimate guide on how to clean a canvas tent! If you’re a lover of the outdoors and appreciate the durability and classic feel of a canvas tent, you know that keeping it clean is vital. A well-maintained canvas tent can be a cozy home away from home for many years, but it requires a little effort to keep it in tip-top shape.
This guide will walk you through everything you need to know, from general cleaning and stain removal to drying and proper storage. We’ll break down the process into easy-to-follow steps, so you can confidently tackle any mess your adventures throw at your tent. Get ready to learn how to make your canvas tent look and perform its best for countless camping trips to come!
Key Takeaways
- Inspect Your Tent Thoroughly: Before cleaning, always check your tent for damage, tears, or loose seams that might need repair.
- Gentle Cleaning is Key: Avoid harsh chemicals and abrasive materials. A mild soap and water solution is usually sufficient for most cleaning needs.
- Air Dry is Crucial: Never store a damp tent. Always allow your canvas tent to air dry completely, preferably in a well-ventilated area, to prevent mildew.
- Spot Clean Stains Promptly: Address spills and stains as soon as they happen to make them easier to remove and prevent permanent marks.
- Re-waterproof When Necessary: Over time, the water-repellent treatment on your canvas tent can wear off. Reapplying it ensures your tent stays dry.
- Proper Storage Prevents Damage: Store your clean, dry tent in a cool, dry place, away from direct sunlight and pests.
Why Cleaning Your Canvas Tent Matters
Canvas tents are fantastic, but they are also natural fibers. This means they can be susceptible to mold, mildew, dirt, and general wear and tear if not cared for properly. Regular cleaning not only keeps your tent looking good but also:
- Prevents Mildew and Mold Growth: These can weaken the fabric and create unpleasant odors.
- Maintains Waterproofing: Dirt and grime can break down the natural water-repellent properties of the canvas.
- Extends Tent Lifespan: Proper care significantly increases how long your tent will last.
- Ensures a Healthy Camping Environment: A clean tent means a cleaner, more enjoyable camping experience.
Now, let’s get down to the nitty-gritty of cleaning.
Step 1: Preparation and Inspection

Visual guide about How Do You Clean a Canvas Tent
Image source: mastercanopies.com
Before you start any cleaning, it’s important to prepare your workspace and inspect your tent.
Gather Your Supplies
You won’t need a lot of fancy equipment. Here’s what you should have on hand:
- A bucket or two
- Lukewarm water
- Mild soap (like biodegradable dish soap or a specialized canvas tent cleaner)
- A soft-bristled brush or a soft cloth
- Clean towels or cloths for drying
- Optional: White vinegar (for stubborn stains or mildew)
- Optional: A tarp or a clean surface to lay the tent on
Inspect Your Tent
Lay your tent out completely on a flat, clean surface. This is the perfect opportunity to check for any damage. Look for:
- Tears or holes: Address these before they get bigger.
- Loose seams: These might need re-stitching.
- Zippers: Ensure they are running smoothly.
- Mold or mildew spots: Note their locations for targeted cleaning.
If you find any significant damage, it might be worth looking into tent repair kits or consulting a professional before proceeding with a deep clean.
Step 2: Dry Cleaning and Debris Removal
Visual guide about How Do You Clean a Canvas Tent
Image source: thespruce.com
The first step in cleaning is to remove all loose dirt and debris.
Shake It Out
If your tent is still somewhat dry, give it a good shake to dislodge as much dirt, leaves, and dust as possible. You might need to do this outside or over a tarp to avoid spreading the mess.
Brush Away Dry Dirt
Use a soft-bristled brush or a dry cloth to gently brush away any remaining loose dirt, cobwebs, or debris from the canvas. Pay attention to corners and seams where dirt tends to accumulate.
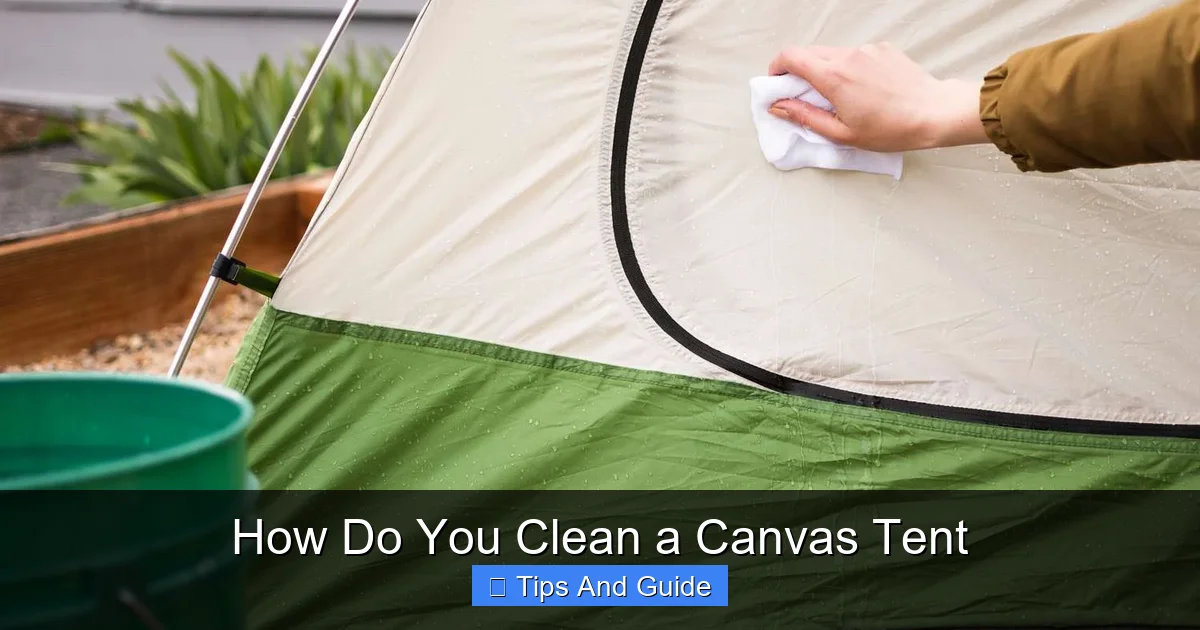
Step 3: Wet Cleaning Your Canvas Tent

Visual guide about How Do You Clean a Canvas Tent
Image source: rusticaly.com
Now it’s time for the actual washing. Remember, gentleness is key!
The Mild Soap and Water Method
1. Mix Your Solution: Fill a bucket with lukewarm water and add a small amount of mild soap. You don’t want excessive suds, as these can be harder to rinse out. A good starting point is about one to two tablespoons of soap per gallon of water.
2. Dampen the Canvas: Using a clean cloth or sponge, dip it into the soapy water and wring it out well. Gently wipe down the surface of the tent. Work in sections.
3. Scrub Gently: For any areas with visible dirt, use your soft-bristled brush or the damp cloth to gently scrub. Avoid aggressive scrubbing, which can damage the canvas fibers.
4. Rinse Thoroughly: This is a crucial step! Using a separate bucket of clean, lukewarm water and a clean cloth, wipe down the tent to remove all soap residue. You may need to rinse your cloth or sponge frequently. Make sure you get all the soap out, as leftover soap can attract dirt and hinder waterproofing.
Dealing with Mildew and Stubborn Stains
If you encounter mildew spots or stubborn stains, you can use a slightly stronger solution.
1. White Vinegar Solution: Mix a solution of one part white vinegar to five parts water.
2. Apply and Scrub: Dip a cloth or brush into this solution and gently scrub the affected areas. Vinegar is a natural disinfectant and can help kill mildew spores.
3. Rinse Well: After treating the spots, rinse the entire tent thoroughly with clean water to remove any vinegar residue. The smell of vinegar will dissipate as the tent dries.
Important Note: Always test any cleaning solution on an inconspicuous area of the tent first to ensure it doesn’t cause discoloration or damage.
Step 4: Rinsing and Final Wipe-Down
After cleaning, a thorough rinse is essential.
Rinse, Rinse, Rinse!
Ensure all soap and cleaning solution residue is completely gone. You can use a hose on a gentle spray setting or continue wiping with clean, damp cloths. Any leftover residue can lead to problems down the line.
Final Inspection
Once you’ve rinsed, give your tent another quick visual inspection. Are there any spots you missed? Is all the soap gone? Address any issues now.
Step 5: Drying Your Canvas Tent – The Most Important Step!
This is arguably the most critical stage for preventing damage and ensuring your tent is ready for storage or its next use.
Never Store a Damp Tent
Storing a damp canvas tent is a recipe for disaster. It’s the quickest way to encourage mold and mildew growth, which can permanently damage the fabric and create a musty odor that’s hard to get rid of.
Air Dry Thoroughly
1. Find a Suitable Location: The best place to dry your tent is outdoors, in a well-ventilated area, preferably in direct sunlight. Sunlight helps to naturally kill any remaining mildew spores and can help brighten the canvas. However, avoid leaving it in direct sun for extended periods once it’s completely dry, as prolonged UV exposure can degrade the fabric.
2. Set It Up (If Possible): If you have the space and the weather permits, setting up your tent to dry allows air to circulate freely inside and out. This speeds up the drying process significantly.
3. Hang It or Drape It: If setting it up isn’t an option, hang the tent over a sturdy line or drape it over several clean surfaces, ensuring maximum airflow to all parts. Spread out the fabric as much as possible.
4. Be Patient: Canvas takes time to dry. Depending on the humidity and temperature, this could take anywhere from a few hours to a couple of days. Don’t rush it! Feel the fabric – it should be completely dry to the touch, not even slightly damp.
What to Avoid During Drying
- Machine Drying: Never put a canvas tent in a clothes dryer. The heat can shrink or damage the fabric and any waterproof coatings.
- Using a Heater: Avoid using artificial heat sources like space heaters to speed up drying. They can cause uneven drying and potential damage.
Step 6: Re-Waterproofing Your Tent (Optional but Recommended)
Over time, the original water-repellent treatment on your canvas tent can wear off, especially after cleaning. Re-waterproofing will ensure your tent continues to keep you dry.
When to Re-waterproof
* After a thorough cleaning.
* If water no longer beads up and rolls off the fabric.
* If you notice dampness inside the tent during light rain.
How to Re-waterproof
1. Choose a Repellent: There are several waterproofing sprays and treatments specifically designed for canvas tents. Look for products that are breathable and won’t clog the pores of the canvas.
2. Apply Evenly: Ensure your tent is completely dry before applying any treatment. Spray or apply the waterproofing agent evenly over the entire exterior surface of the tent, following the product’s instructions. Pay attention to seams and stress points.
3. Allow to Cure: Let the waterproofing agent cure according to the manufacturer’s recommendations. This often involves letting it sit for a period, sometimes in sunlight, before packing it away.
Step 7: Proper Storage
Once your tent is sparkling clean and completely dry, it’s time to store it properly.
Choose the Right Location
* Cool and Dry: Store your tent in a place that is consistently cool and dry. Avoid damp basements or humid attics.
* Away from Pests: Rodents and insects can damage tent fabric. Ensure your storage area is free of them. A sealed plastic container can offer extra protection.
* Out of Direct Sunlight: UV rays can degrade canvas over time, so avoid storing it where it will be exposed to sunlight.
How to Pack Your Tent
1. Loosely Roll or Fold: Avoid tightly packing or stuffing your tent, as this can crease the fabric excessively and potentially weaken seams over time. Loosely roll or fold it.
2. Use the Original Bag (If Possible): If your tent came with a breathable storage bag, use it. This protects the tent while allowing for some air circulation. If not, a breathable duffel bag or even an old cotton sheet can work. Avoid plastic bags, which can trap moisture.
Troubleshooting Common Canvas Tent Issues
My Tent Still Smells Musty After Cleaning
This usually means it wasn’t dried completely, or there are still mildew spores present. Ensure it’s bone dry. For persistent odors, try airing it out in the sun for a full day or using a specialized tent deodorizer.
There are Still Stains on My Tent
Some stains, especially oil-based ones, can be very difficult to remove completely from canvas. For tough stains, you might consider a specialized canvas cleaner or a poultice made from an absorbent material (like Fuller’s Earth or cornstarch) mixed with a cleaning agent. Let it sit on the stain, then brush off. Always test first!
Water is Seeping Through Seams
The seam sealant might have worn off. You can buy seam sealers designed for tents and reapply them to the seams.
Conclusion
Cleaning your canvas tent might seem like a daunting task, but with the right approach, it’s manageable and incredibly rewarding. By following these steps – from careful inspection and gentle cleaning to thorough drying and proper storage – you’ll not only keep your tent looking great but also ensure its durability for years of outdoor adventures. Remember, a clean tent is a happy tent, and a happy tent means a happy camper! So, invest a little time in its care, and your canvas tent will repay you with countless comfortable and dry nights under the stars. Enjoy your clean and well-protected shelter on your next expedition!