
Tarping your tent is one of the smartest moves you can make to protect your shelter from rain, wind, and ground moisture. When done right, a tarp adds an extra layer of defense, extends your tent’s lifespan, and keeps you dry and comfortable—even in unexpected downpours.
[FEATURED_IMAGE_PLACEHENTER]
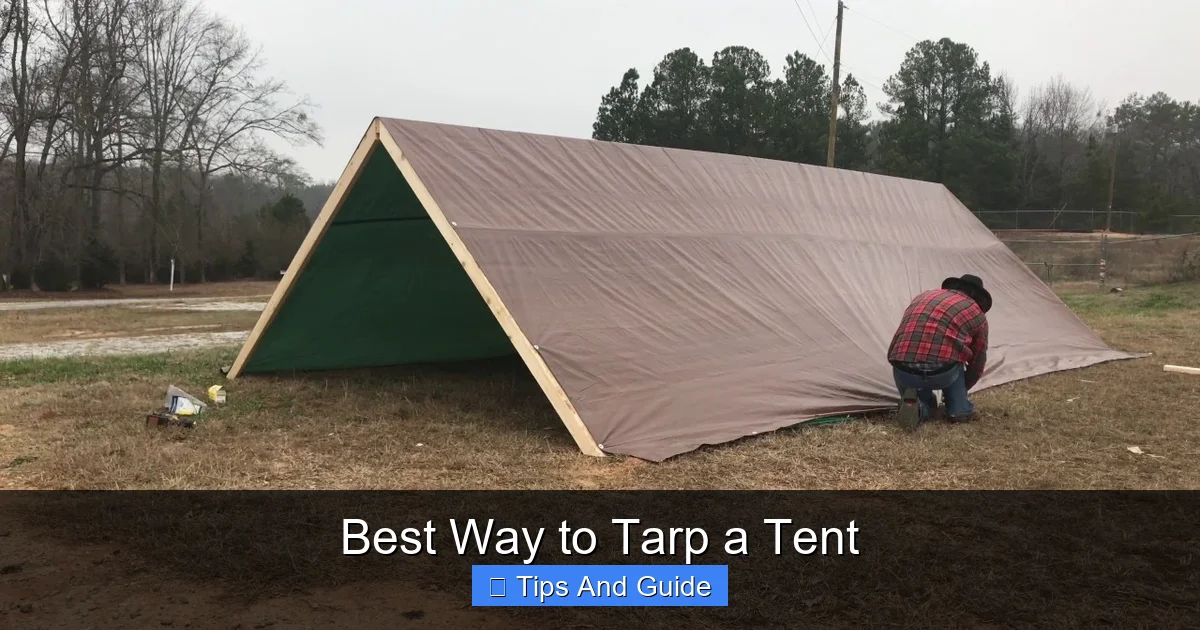
Camping is all about embracing the outdoors—but that doesn’t mean you have to suffer through soggy gear and sleepless nights. One of the simplest yet most effective upgrades you can make to your camping setup is learning the best way to tarp a tent. Whether you’re a weekend warrior or a seasoned backpacker, adding a tarp to your shelter system can mean the difference between a cozy, dry night and a miserable, wet ordeal.
A tarp acts as a protective shield above your tent, deflecting rain, blocking wind, and even reducing ground moisture. But it’s not just about throwing a sheet of plastic over your tent and hoping for the best. The best way to tarp a tent involves thoughtful planning, the right materials, and smart setup techniques. When done correctly, a tarp enhances your shelter’s performance without adding much weight or complexity.
Key Takeaways
- Choose the right tarp size: A tarp should be at least 2 feet wider and longer than your tent to provide full coverage.
- Use a high-quality, waterproof tarp: Look for rip-stop polyethylene or silnylon tarps with reinforced grommets for durability.
- Set up the tarp before pitching the tent: This ensures proper placement and avoids last-minute adjustments in the rain.
- Create a slight slope for water runoff: Angle the tarp so water flows away from your tent, not toward it.
- Anchor securely with guy lines and stakes: Use strong tension to prevent flapping and wind damage.
- Avoid direct contact between tarp and tent: This prevents condensation buildup and keeps your tent fabric dry.
- Consider the tarp configuration: A-frame, lean-to, or diamond setups each offer different levels of coverage and ventilation.
📑 Table of Contents
Why Tarping Your Tent Is Essential
Let’s be honest—no tent is 100% waterproof forever. Over time, seams can weaken, fabric can degrade, and zippers can fail. Even high-end tents can leak under heavy rain or prolonged exposure. That’s where a tarp comes in. It’s like giving your tent a raincoat.
But the benefits go beyond just keeping you dry. A properly placed tarp can also:
– Reduce condensation inside your tent by improving airflow
– Protect your tent floor from sharp rocks, roots, and moisture
– Provide shade on hot days, helping you stay cool
– Create a dry outdoor space for gear storage or cooking
Think of the tarp as your first line of defense. It takes the brunt of the weather so your tent doesn’t have to. And when you’re miles from the nearest store, that extra protection can be a game-changer.
Choosing the Right Tarp for Your Tent
Not all tarps are created equal. Picking the right one is the first step in mastering the best way to tarp a tent.
Material Matters
The most common tarp materials are polyethylene (poly) and silnylon. Poly tarps are affordable, durable, and highly waterproof—great for car camping or base camps. Silnylon is lighter and more packable, making it ideal for backpackers. Both work well, but choose based on your needs. If you’re hiking long distances, go light. If you’re setting up for a few days, durability wins.
Visual guide about Best Way to Tarp a Tent
Image source: i.ytimg.com
Size and Shape
Your tarp should be at least 2 feet wider and longer than your tent. For example, if your tent is 8 feet long, use a 10×10 or 12×12 tarp. This ensures full coverage, even if the wind shifts. Rectangular tarps offer more flexibility, but square tarps are easier to pitch in multiple configurations.
Grommets and Reinforcements
Check the tarp’s edges for reinforced grommets—these are where you’ll attach guy lines. Cheap tarps often have weak grommets that tear under tension. Look for double-stitched edges and rust-resistant grommets for long-term use.
Best Tarp Configurations for Tent Protection
There’s no one-size-fits-all setup. The best way to tarp a tent depends on the weather, terrain, and your tent type. Here are the most effective configurations.
A-Frame Setup
The A-frame is the classic choice. Run a ridgeline between two trees or poles, drape the tarp over it, and secure the sides with guy lines. This creates a sloped roof that sheds water quickly. It’s great for heavy rain and offers full coverage on both sides of the tent.
Lean-To Configuration
In a lean-to, one side of the tarp is higher than the other, creating a slanted roof. This is perfect when you want protection from one direction—like wind or rain from the west. It also allows for better airflow, which helps reduce condensation. Just make sure the open side faces away from the prevailing wind.
Diamond or Diagonal Pitch
This setup involves tying one corner of the tarp high and the opposite corner low, creating a diamond shape. It’s excellent for uneven terrain or when you have limited anchor points. The diamond pitch offers good coverage and wind resistance, though it may require more practice to get right.
Fly-Over or Direct Cover
Some campers place the tarp directly over the tent, but this is risky. If the tarp touches the tent, condensation can form and drip inside. Instead, use a fly-over setup with poles or a ridgeline to keep the tarp elevated. This creates an air gap that prevents moisture transfer.
Step-by-Step Guide to Tarping Your Tent
Now that you know the options, here’s how to do it right.
Step 1: Scout the Site
Look for level ground with good drainage. Avoid low spots where water might pool. Check for overhanging branches—dead ones can fall in strong winds. If possible, find two trees about 10–15 feet apart for your ridgeline.
Step 2: Lay Down a Ground Tarp (Optional)
Before pitching your tent, place a smaller tarp on the ground. This protects the tent floor from moisture and abrasion. Make sure it’s slightly smaller than the tent base so rain doesn’t collect underneath.
Step 3: Pitch the Tarp First
Set up the tarp before your tent. This gives you a dry workspace and ensures proper placement. Use a ridgeline or poles to lift the center, then secure the corners with stakes and guy lines. Keep tension even to avoid sagging.
Step 4: Pitch the Tent Under the Tarp
Once the tarp is secure, set up your tent beneath it. Leave at least 6–12 inches of space between the tarp and tent to allow airflow. This gap prevents condensation and keeps your tent fabric dry.
Step 5: Adjust and Secure
Check all guy lines and stakes. In windy conditions, add extra anchors or use sandbags. Make sure the tarp slopes away from the tent so water runs off the sides, not onto your gear.
Common Mistakes to Avoid
Even experienced campers make tarp errors. Here’s what to watch out for.
Letting the Tarp Touch the Tent
This is the #1 mistake. When the tarp touches the tent, moisture gets trapped, leading to condensation and potential leaks. Always maintain an air gap.
Using a Tarp That’s Too Small
A small tarp won’t provide full coverage. Rain can sneak in from the sides, especially in windy conditions. Bigger is better when it comes to tarp size.
Over-Tightening Guy Lines
While tension is important, over-tightening can tear grommets or warp the tarp. Aim for firm but flexible lines that can handle wind shifts.
Ignoring Wind Direction
Always orient your tarp so the open side (if using a lean-to) faces away from the wind. This prevents rain from blowing underneath.
Tips for Extreme Weather Conditions
The best way to tarp a tent changes slightly depending on the forecast.
Heavy Rain
Use an A-frame or full-coverage setup. Double-check all seams and reinforce stakes. Consider using a second tarp on the ground for extra protection.
High Winds
Opt for a low-profile diamond pitch or lean-to. Use extra guy lines and bury stakes at an angle for better hold. Avoid tall setups that catch wind like a sail.
Hot Weather
In summer, a tarp can provide shade and reduce heat buildup. Use a light-colored tarp to reflect sunlight. Position it to allow cross-ventilation—this helps keep your tent cool. For more tips, check out our guide on the best way to keep cool in a tent.
Cold Weather
In winter, a tarp can block wind and snow. But be cautious—snow can accumulate on the tarp and collapse it. Use a steep pitch and check frequently. For warmth strategies, see our article on the best way to keep warm in a tent.
Maintaining Your Tarp and Tent
A tarp is only as good as its condition. After each trip, clean your tarp with mild soap and water. Let it dry completely before storing to prevent mold. Inspect for tears or worn grommets and repair them promptly.
Your tent benefits too. With a tarp overhead, the fabric stays cleaner and drier, which extends its life. For post-trip care, read our guide on the best way to clean a tent after camping.
Final Thoughts
Learning the best way to tarp a tent isn’t just about survival—it’s about comfort, confidence, and getting the most out of your outdoor adventures. A well-placed tarp turns a basic tent into a reliable shelter that can handle whatever nature throws at it.
Whether you’re braving a thunderstorm or enjoying a sunny weekend, the right tarp setup makes all the difference. So next time you head out, don’t forget that extra layer of protection. Your future dry, happy self will thank you.
Frequently Asked Questions
Should I put the tarp over or under my tent?
Always place the tarp over your tent, not under. A ground tarp can protect the floor, but the main tarp should be above to shield from rain and wind. Putting it under can trap moisture and cause leaks.
Can I use a tarp instead of a tent footprint?
Yes, a tarp can double as a footprint to protect your tent floor. Just make sure it’s slightly smaller than the tent base to prevent water from seeping underneath.
How high should the tarp be above the tent?
Aim for at least 6–12 inches of clearance. This allows airflow, reduces condensation, and prevents the tarp from touching the tent fabric during wind or rain.
What’s the best tarp material for backpacking?
Silnylon is ideal for backpacking because it’s lightweight, packs small, and is highly waterproof. Poly tarps are heavier but more durable for car camping.
Do I need a tarp if my tent has a rainfly?
Yes, especially in heavy rain or prolonged wet conditions. A tarp adds an extra layer of protection and can prevent ground splash from soaking your tent walls.
How do I keep my tarp from flapping in the wind?
Use strong guy lines and secure stakes at a 45-degree angle. Add extra anchors if needed, and avoid over-tightening, which can cause tearing.