
Setting up a grow tent the right way can make or break your indoor gardening success. This guide walks you through every step—from choosing the right location to optimizing airflow and lighting—so you can create a thriving, efficient growing environment. Whether you’re a beginner or upgrading your setup, these proven strategies will help you grow healthier plants with better yields.
Key Takeaways
- Choose the right location: Pick a stable, accessible spot with easy access to power and minimal foot traffic to avoid disturbances.
- Assemble the tent properly: Follow the manufacturer’s instructions carefully and ensure all zippers and seams are sealed to maintain environmental control.
- Optimize lighting setup: Use full-spectrum LED or HID lights mounted at the correct height to prevent heat stress and ensure even coverage.
- Install efficient ventilation: Use inline fans, carbon filters, and ducting to manage temperature, humidity, and odor effectively.
- Control climate with monitoring tools: Invest in a hygrometer and thermometer to track temperature and humidity levels in real time.
- Organize for efficiency: Use shelves, hooks, and trays to keep tools and plants neatly arranged, maximizing space and workflow.
- Maintain cleanliness: Regularly clean the interior and exterior to prevent pests, mold, and contamination.
📑 Table of Contents
- Introduction: Why a Well-Set-Up Grow Tent Matters
- Step 1: Choose the Right Location
- Step 2: Assemble the Grow Tent Correctly
- Step 3: Set Up Lighting for Maximum Efficiency
- Step 4: Install Ventilation and Climate Control
- Step 5: Organize Your Grow Tent for Efficiency
- Step 6: Maintain Cleanliness and Prevent Pests
- Conclusion: Build a Grow Tent That Works for You
Introduction: Why a Well-Set-Up Grow Tent Matters
Growing plants indoors isn’t just about placing a few pots under a light. It’s about creating a controlled environment where your plants can thrive without interference from pests, weather, or inconsistent conditions. That’s where a grow tent comes in—a portable, enclosed space designed to give you full control over light, temperature, humidity, and airflow.
But here’s the catch: even the best grow tent won’t deliver results if it’s not set up correctly. A poorly configured tent can lead to mold, overheating, weak growth, or even total crop failure. That’s why knowing the best way to set up grow tent is essential, whether you’re growing herbs, vegetables, or flowering plants.
In this guide, we’ll walk you through every step of the process—from unboxing to first harvest—so you can build a high-performing indoor garden that’s efficient, clean, and productive.
Step 1: Choose the Right Location
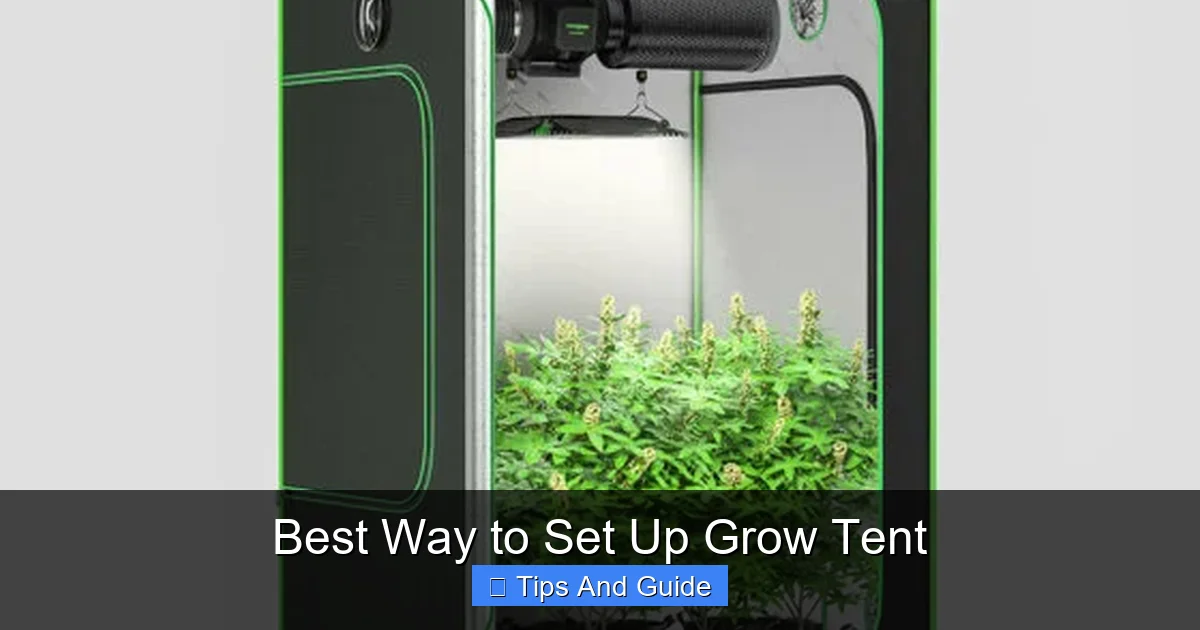
Visual guide about Best Way to Set Up Grow Tent
Image source: vivosun.com
Before you even think about assembling your tent, you need to pick the perfect spot. The location you choose will impact everything from temperature stability to how easy it is to maintain your setup.
Look for a Stable, Level Surface
Your grow tent should sit on a flat, stable surface—like a concrete floor or a sturdy wooden platform. Avoid carpeted areas if possible, as they can trap moisture and lead to mold. A basement, spare room, or garage often works well, as long as it’s dry and accessible.
Ensure Easy Access to Power and Water
You’ll need outlets for lights, fans, and other equipment, so make sure your chosen spot is near a reliable power source. If you plan to use a humidifier or automated watering system, proximity to a water source is also helpful.
Minimize Foot Traffic and Vibrations
Avoid high-traffic areas like hallways or living rooms. Constant movement can disturb your plants and increase the risk of knocking over equipment. A quiet, dedicated space gives your plants the peace they need to grow strong.
Step 2: Assemble the Grow Tent Correctly
Once you’ve picked your spot, it’s time to build the tent. Most grow tents come with a frame, fabric cover, and basic hardware. While it might seem straightforward, skipping steps or rushing can lead to problems later.
Follow the Manufacturer’s Instructions
Every tent is a little different, so don’t assume you know how to assemble it. Take your time and follow the manual. Most tents use a pole-and-connector system—make sure all joints are secure and the frame is square.
Check for Light Leaks
After assembly, turn off the lights in the room and look for any gaps where light might escape. Even small leaks can disrupt your plants’ light cycles, especially during the dark period. Use duct tape or light-proof patches to seal any openings around zippers or seams.
Install the Reflective Interior
Most grow tents come with a reflective Mylar lining. Make sure it’s installed correctly—shiny side facing inward—to maximize light distribution. This helps ensure that every leaf gets the light it needs, boosting growth and yield.
Step 3: Set Up Lighting for Maximum Efficiency
Lighting is the heart of your grow tent. Without the right setup, your plants won’t get the energy they need to grow.
Choose the Right Type of Light
For most growers, full-spectrum LED lights are the best option. They’re energy-efficient, produce less heat, and mimic natural sunlight. High-Intensity Discharge (HID) lights like MH and HPS are also popular but generate more heat and use more power.
Mount Lights at the Correct Height
Too close, and you risk light burn; too far, and your plants won’t get enough intensity. As a general rule, keep LED lights 18–24 inches above the canopy during the vegetative stage and 12–18 inches during flowering. Use a light hanger or adjustable rope ratchet system for easy height adjustments.
Use a Timer for Consistent Light Cycles
Plants need a consistent light schedule to thrive. Use a digital timer to automate your lighting—typically 18 hours on and 6 hours off during veg, and 12/12 during flowering. This not only saves time but also prevents human error.
Step 4: Install Ventilation and Climate Control
Good airflow is critical for healthy plants. It prevents mold, regulates temperature, and ensures your plants get fresh CO₂.
Set Up an Inline Fan and Carbon Filter
An inline fan pulls stale air out of the tent and pushes it through a carbon filter to remove odors. Mount the fan at the top of the tent where hot air collects. Use ducting to vent the air outside the room or into another area.
Add an Oscillating Fan for Air Circulation
Even with exhaust, stagnant air can cause problems. Place an oscillating fan inside the tent to gently move air around the plants. This strengthens stems and reduces the risk of mold and pests.
Monitor Temperature and Humidity
Use a digital hygrometer to keep track of conditions. Most plants prefer temperatures between 70–85°F (21–29°C) and humidity levels between 40–60%, depending on the growth stage. If your tent gets too hot, check out our guide on the best way to keep grow tent cool for practical cooling solutions. If it’s too dry, learn how to boost moisture with our tips on the best way to increase humidity in grow tent.
Step 5: Organize Your Grow Tent for Efficiency
A cluttered tent is a breeding ground for problems. Keeping things organized helps you work faster and reduces stress on your plants.
Use Shelves and Trays
Place a small shelf or tray at the bottom of the tent to hold tools, nutrients, or seedling trays. This keeps everything within reach and off the floor, where it could collect dust or moisture.
Label Your Plants and Supplies
If you’re growing multiple strains or stages, label your pots. This helps you track growth, feeding schedules, and harvest times. Use waterproof labels and a permanent marker.
Keep a Maintenance Log
Track watering, feeding, pruning, and any issues you notice. This simple habit helps you spot patterns and improve your process over time.
Step 6: Maintain Cleanliness and Prevent Pests
A clean grow tent is a healthy grow tent. Regular maintenance prevents contamination and keeps your plants thriving.
Clean the Interior Between Cycles
After each harvest, wipe down the walls, floor, and equipment with a mild bleach solution or hydrogen peroxide. This kills bacteria, mold spores, and pests. For detailed steps, see our article on the best way to clean grow tent.
Inspect Plants Regularly
Check leaves—both tops and undersides—for signs of pests like spider mites or aphids. Early detection is key. If you spot trouble, act fast with organic treatments or isolation.
Control Humidity to Prevent Mold
High humidity can lead to powdery mildew, especially in dense canopies. Use proper ventilation and avoid overwatering. For more control strategies, read about the best way to control humidity in grow tent.
Conclusion: Build a Grow Tent That Works for You
Setting up a grow tent might seem overwhelming at first, but with the right approach, it becomes second nature. The best way to set up grow tent isn’t about fancy gear or expensive gadgets—it’s about creating a balanced, controlled environment where your plants can flourish.
Start with a solid foundation: a good location, proper assembly, and quality lighting. Then, layer in ventilation, organization, and cleanliness. Monitor your conditions daily, adjust as needed, and learn from each grow cycle.
Remember, every plant is different, and every grower’s setup is unique. Don’t be afraid to experiment—just keep records so you can replicate success. With patience and attention to detail, your grow tent can become a reliable, high-yield garden that delivers fresh, healthy plants year-round.
Frequently Asked Questions
How long does it take to set up a grow tent?
Most grow tents can be assembled in 30–60 minutes, depending on size and complexity. Adding lights, fans, and other equipment may take another hour or two. Planning ahead and reading instructions can speed up the process.
Can I set up a grow tent in a closet?
Yes, as long as the closet is well-ventilated and has access to power. Make sure there’s enough space for the tent, equipment, and airflow. Avoid enclosed spaces without ventilation, as heat and humidity can build up quickly.
Do I need a carbon filter for my grow tent?
If odor control is a concern—especially with flowering plants—a carbon filter is highly recommended. It removes strong smells from the air, keeping your grow discreet and neighbor-friendly.
What’s the best light for a small grow tent?
Full-spectrum LED grow lights are ideal for small tents. They’re compact, energy-efficient, and produce less heat than HID lights. Look for models with adjustable brightness and daisy-chain capabilities for easy expansion.
How often should I clean my grow tent?
Clean the interior thoroughly between each grow cycle. Wipe down surfaces with a disinfectant to prevent mold and pests. During the grow, do quick spot checks weekly to remove debris or spills.
Can I use a grow tent without ventilation?
It’s not recommended. Without proper airflow, heat and humidity will build up, leading to mold, weak growth, and plant stress. Even a small fan and passive intake vents can make a big difference in air quality.